This guide shows describes how to align your camera precisely towards the very center of the platen. You will need to follow these steps independently for each of the two cameras.
Related Links:
- Archivist User Guide: A general guide to assembling and using the Archivist book scanner itself
- Electronics Pack Guide: The standard electronics pack for the Archivist and how to use it.
- Archivist Design Guide
- DIY Book Scanner Forums The place to find community help and talk about scanning
- Tenrec Builders LLC Shop: A place to purchase a complete and tested electronics pack which includes alignment cards and a mirror.
- If you own an Archivist book scanner or electronics pack and need help, you can mention a problem or ask a question by emailing help at tenrec dot builders
Making Alignment Cards and Mirror
If you already have alignment cards and a mirror, you can skip this section.
Alignment Cards:
Download and print out your alignment card on 8.5"x11" or A4 paper.
When using a printed out version on normal paper, the two cards are consolidated into a single image.
Cut carefully along the outline of the card with a craft knife.
Mirror:
Print out a mirror crosshair guide and a mirror circle guide.
Find a 4" circular mirror that you don't mind permanently marking up.
Cut out the inside of the crosshair with a craft knife. You do not need to cut out anything else.
Place the mirror circle guide on a table. Place the mirror on top so that it aligns exactly with the circle guide. Tape the mirror in place.
Place the crosshair guide over the mirror so that the edges of the paper line up with the mirror circle guide. Tape it into place.
Using a permanent marker, draw a crosshair by following the crosshair guide.
Carefully remove the top paper to avoid smudging. Let the marker dry.
When using the mirror, be careful not to touch or smudge the ink during use.
Preparing the Camera
The CHDK software for your camera is more than just a way for a computer to control the camera. We need to enable the CHDK grid system to help us align the camera.
Make sure that the camera is unconnected to the Raspberry Pi or that the Raspberry Pi is turned off. We will need to use the camera controls and these are disabled whenever the camera connects to a computer for control.
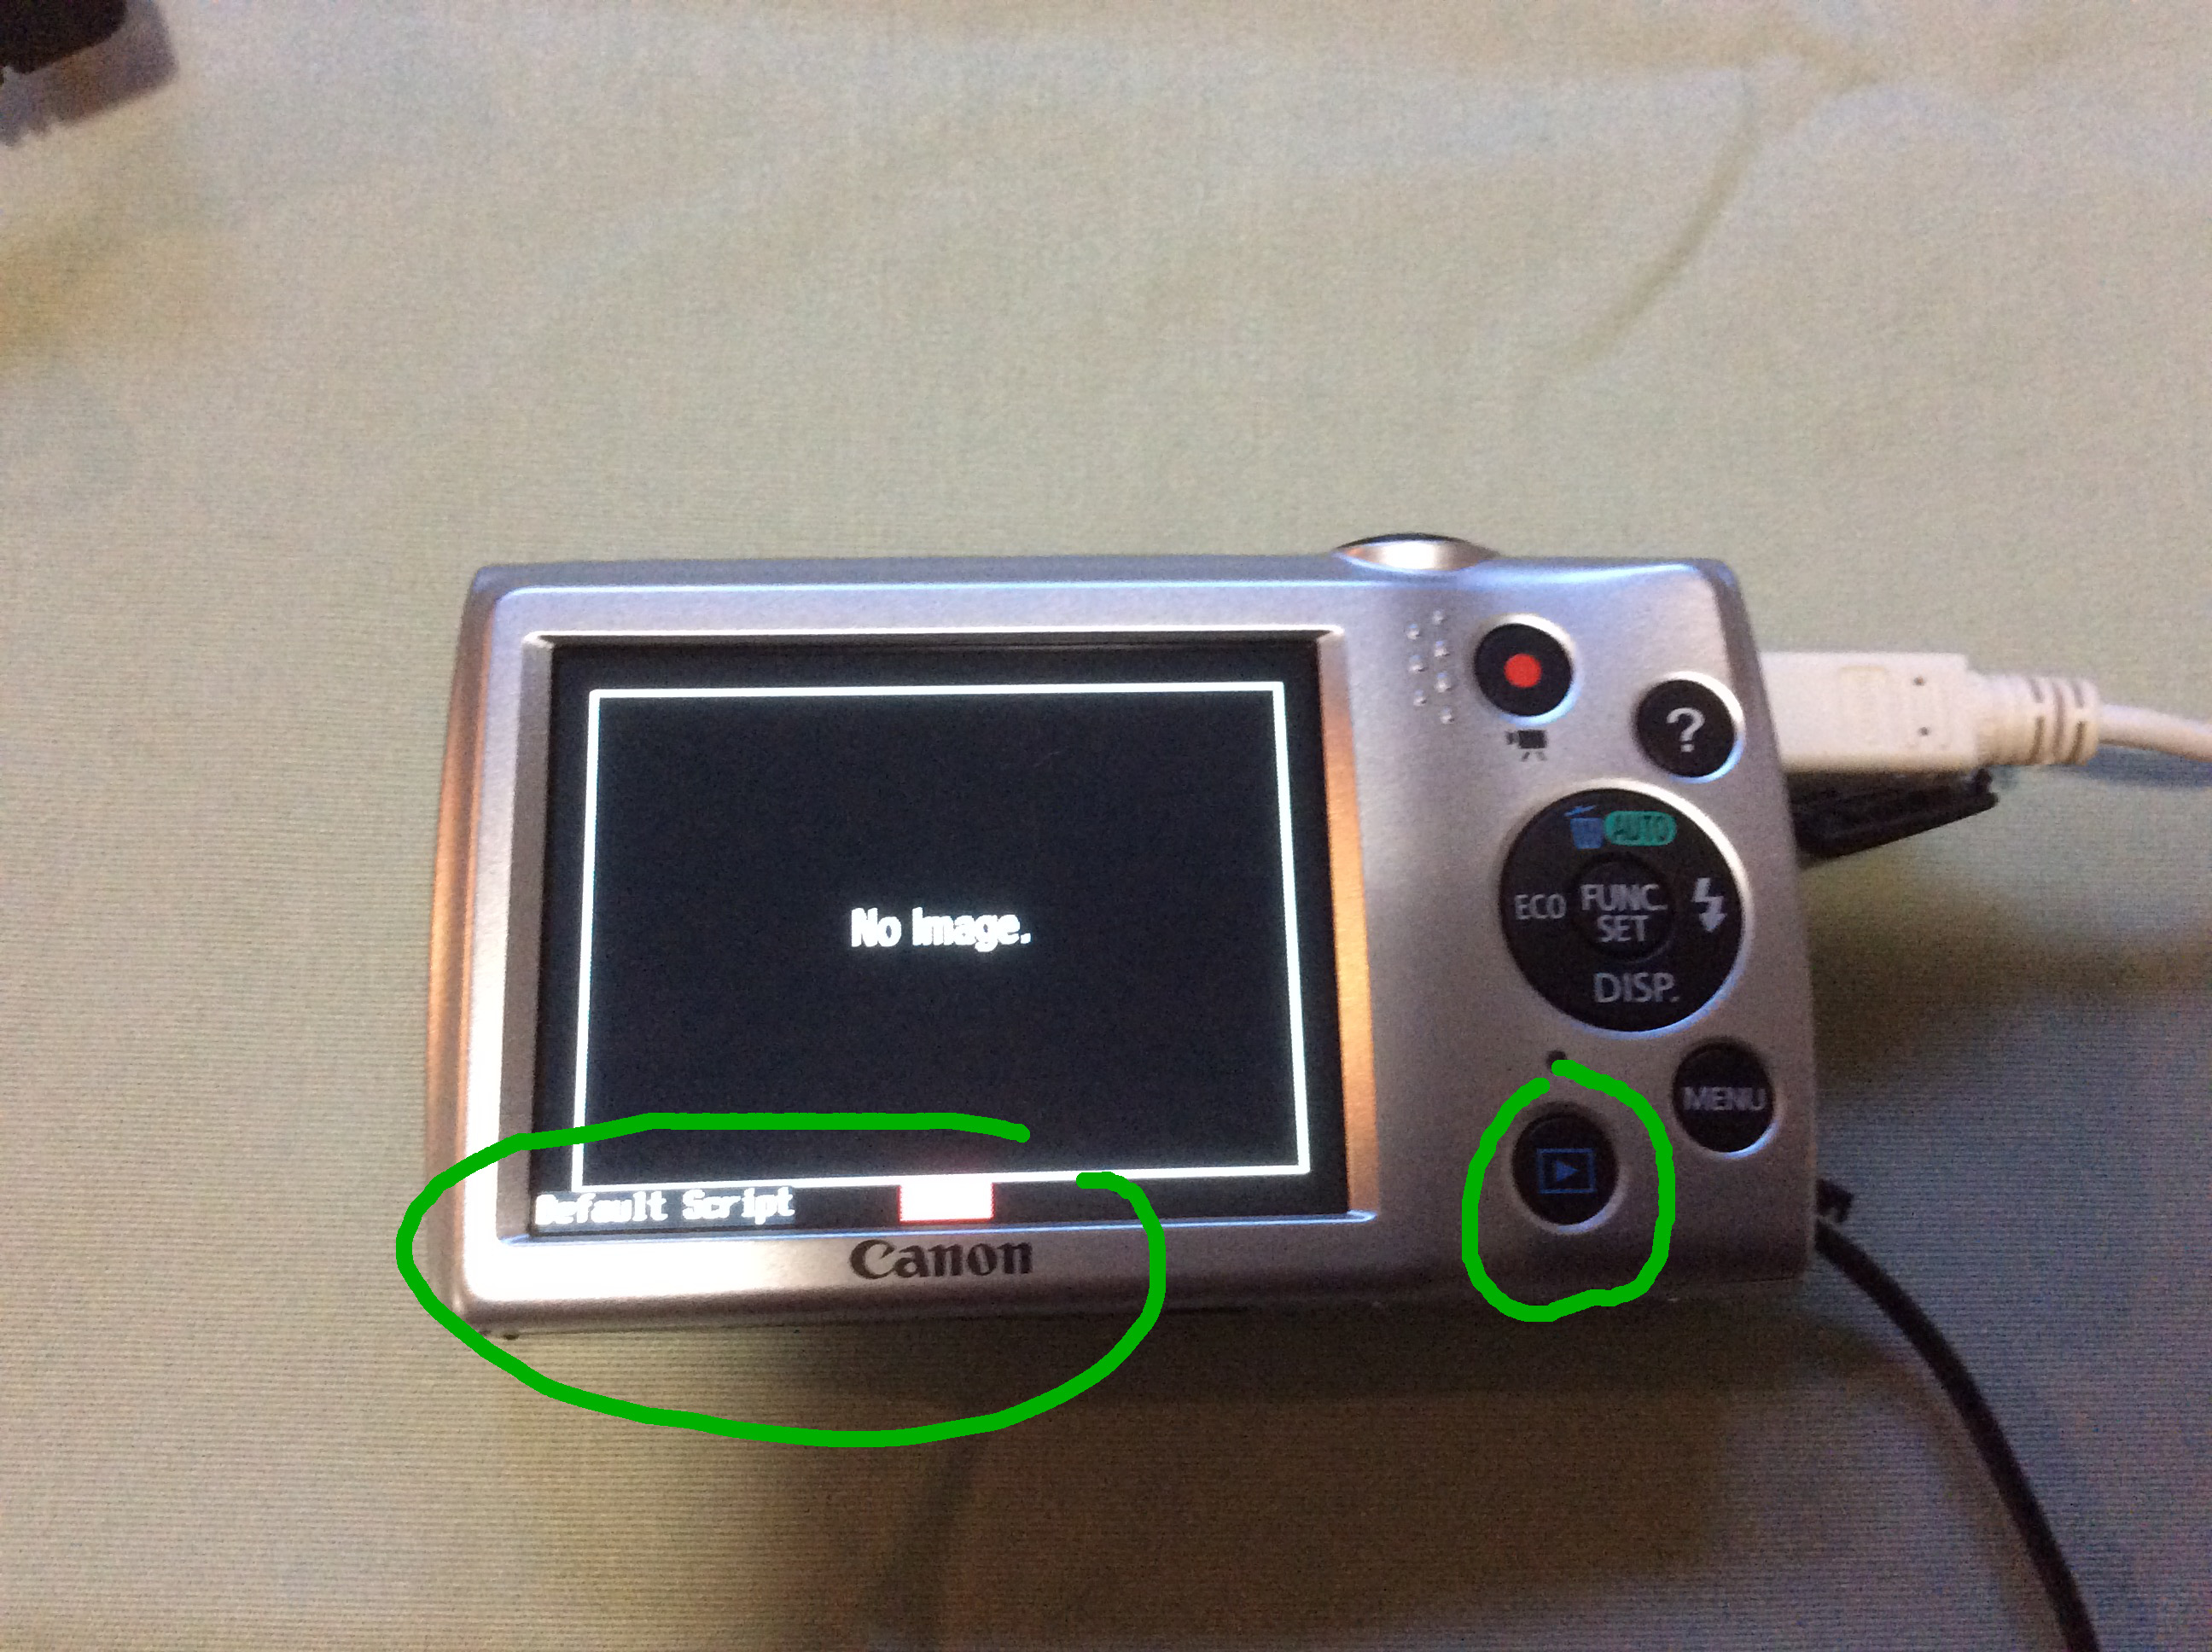
Turn on the camera. Press the play button near the lower-right corner of the screen. This toggles the CHDK <ALT> mode which is then displayed at the bottom of the screen.
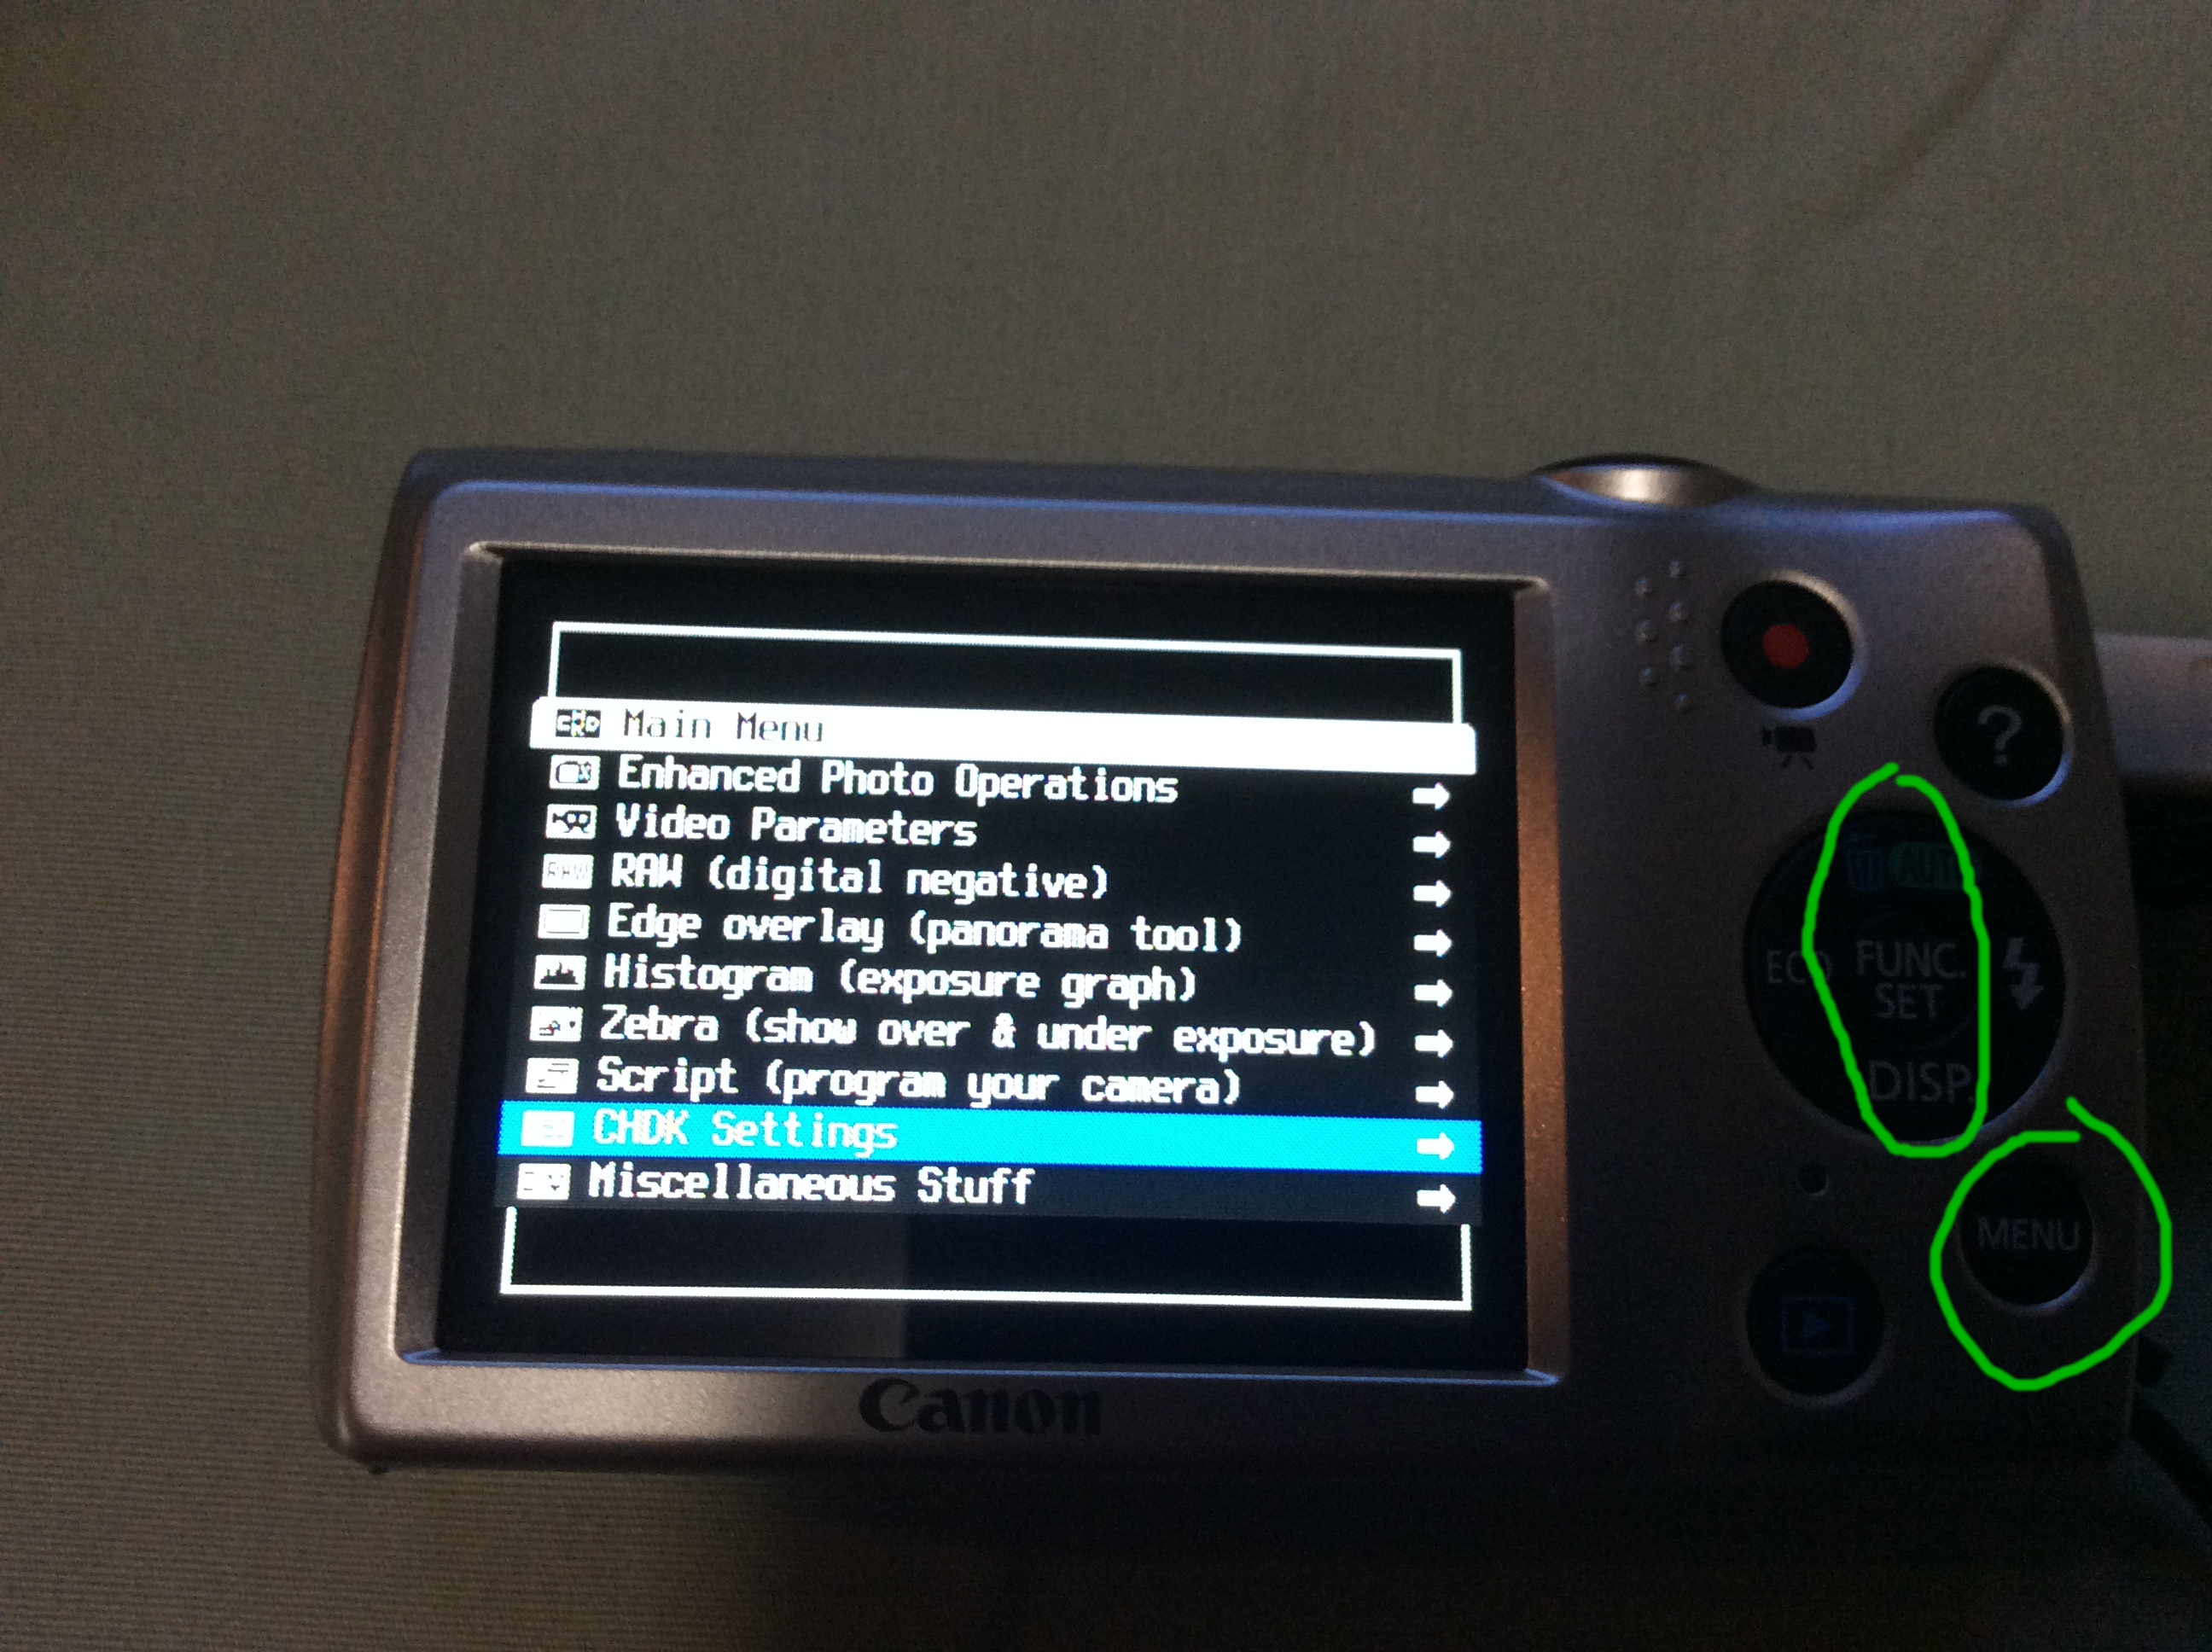
Press the menu button in <ALT> mode to open up the CHDK menu. Use the up and down arrows to navigate and the center button to select.
In the menu, navigate to 'CHDK Settings' and select it.
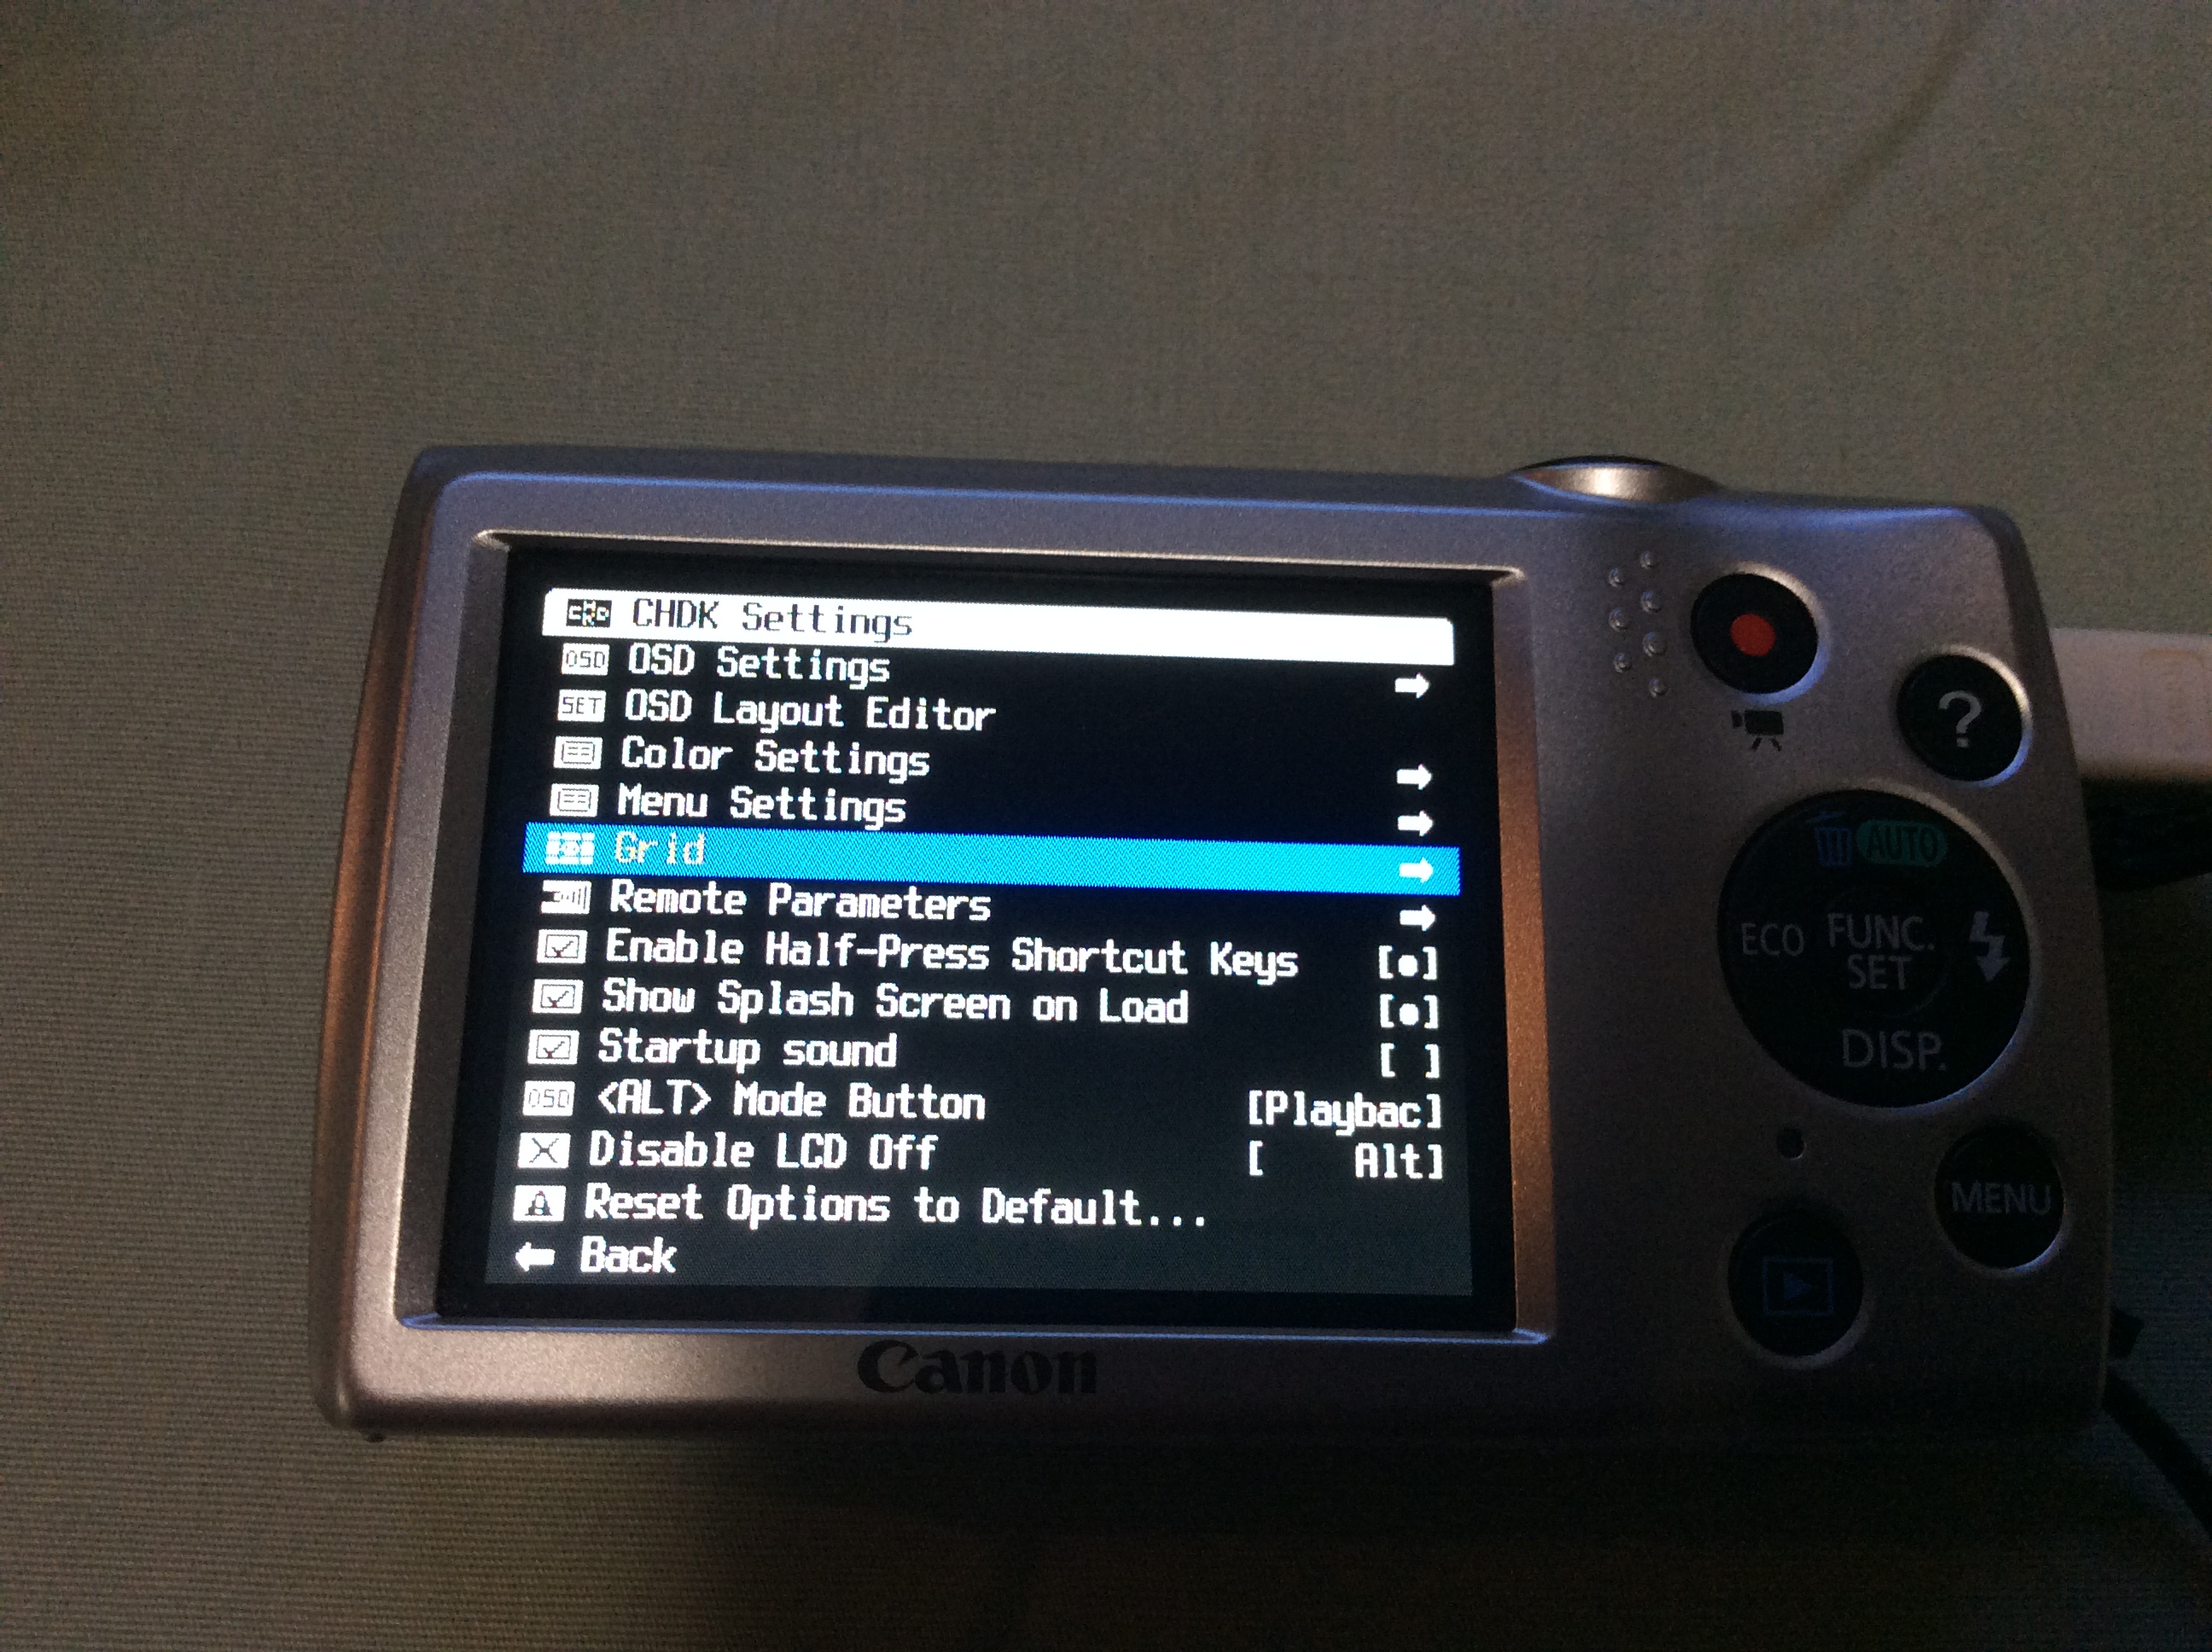
Navigate to 'Grid' and select it.
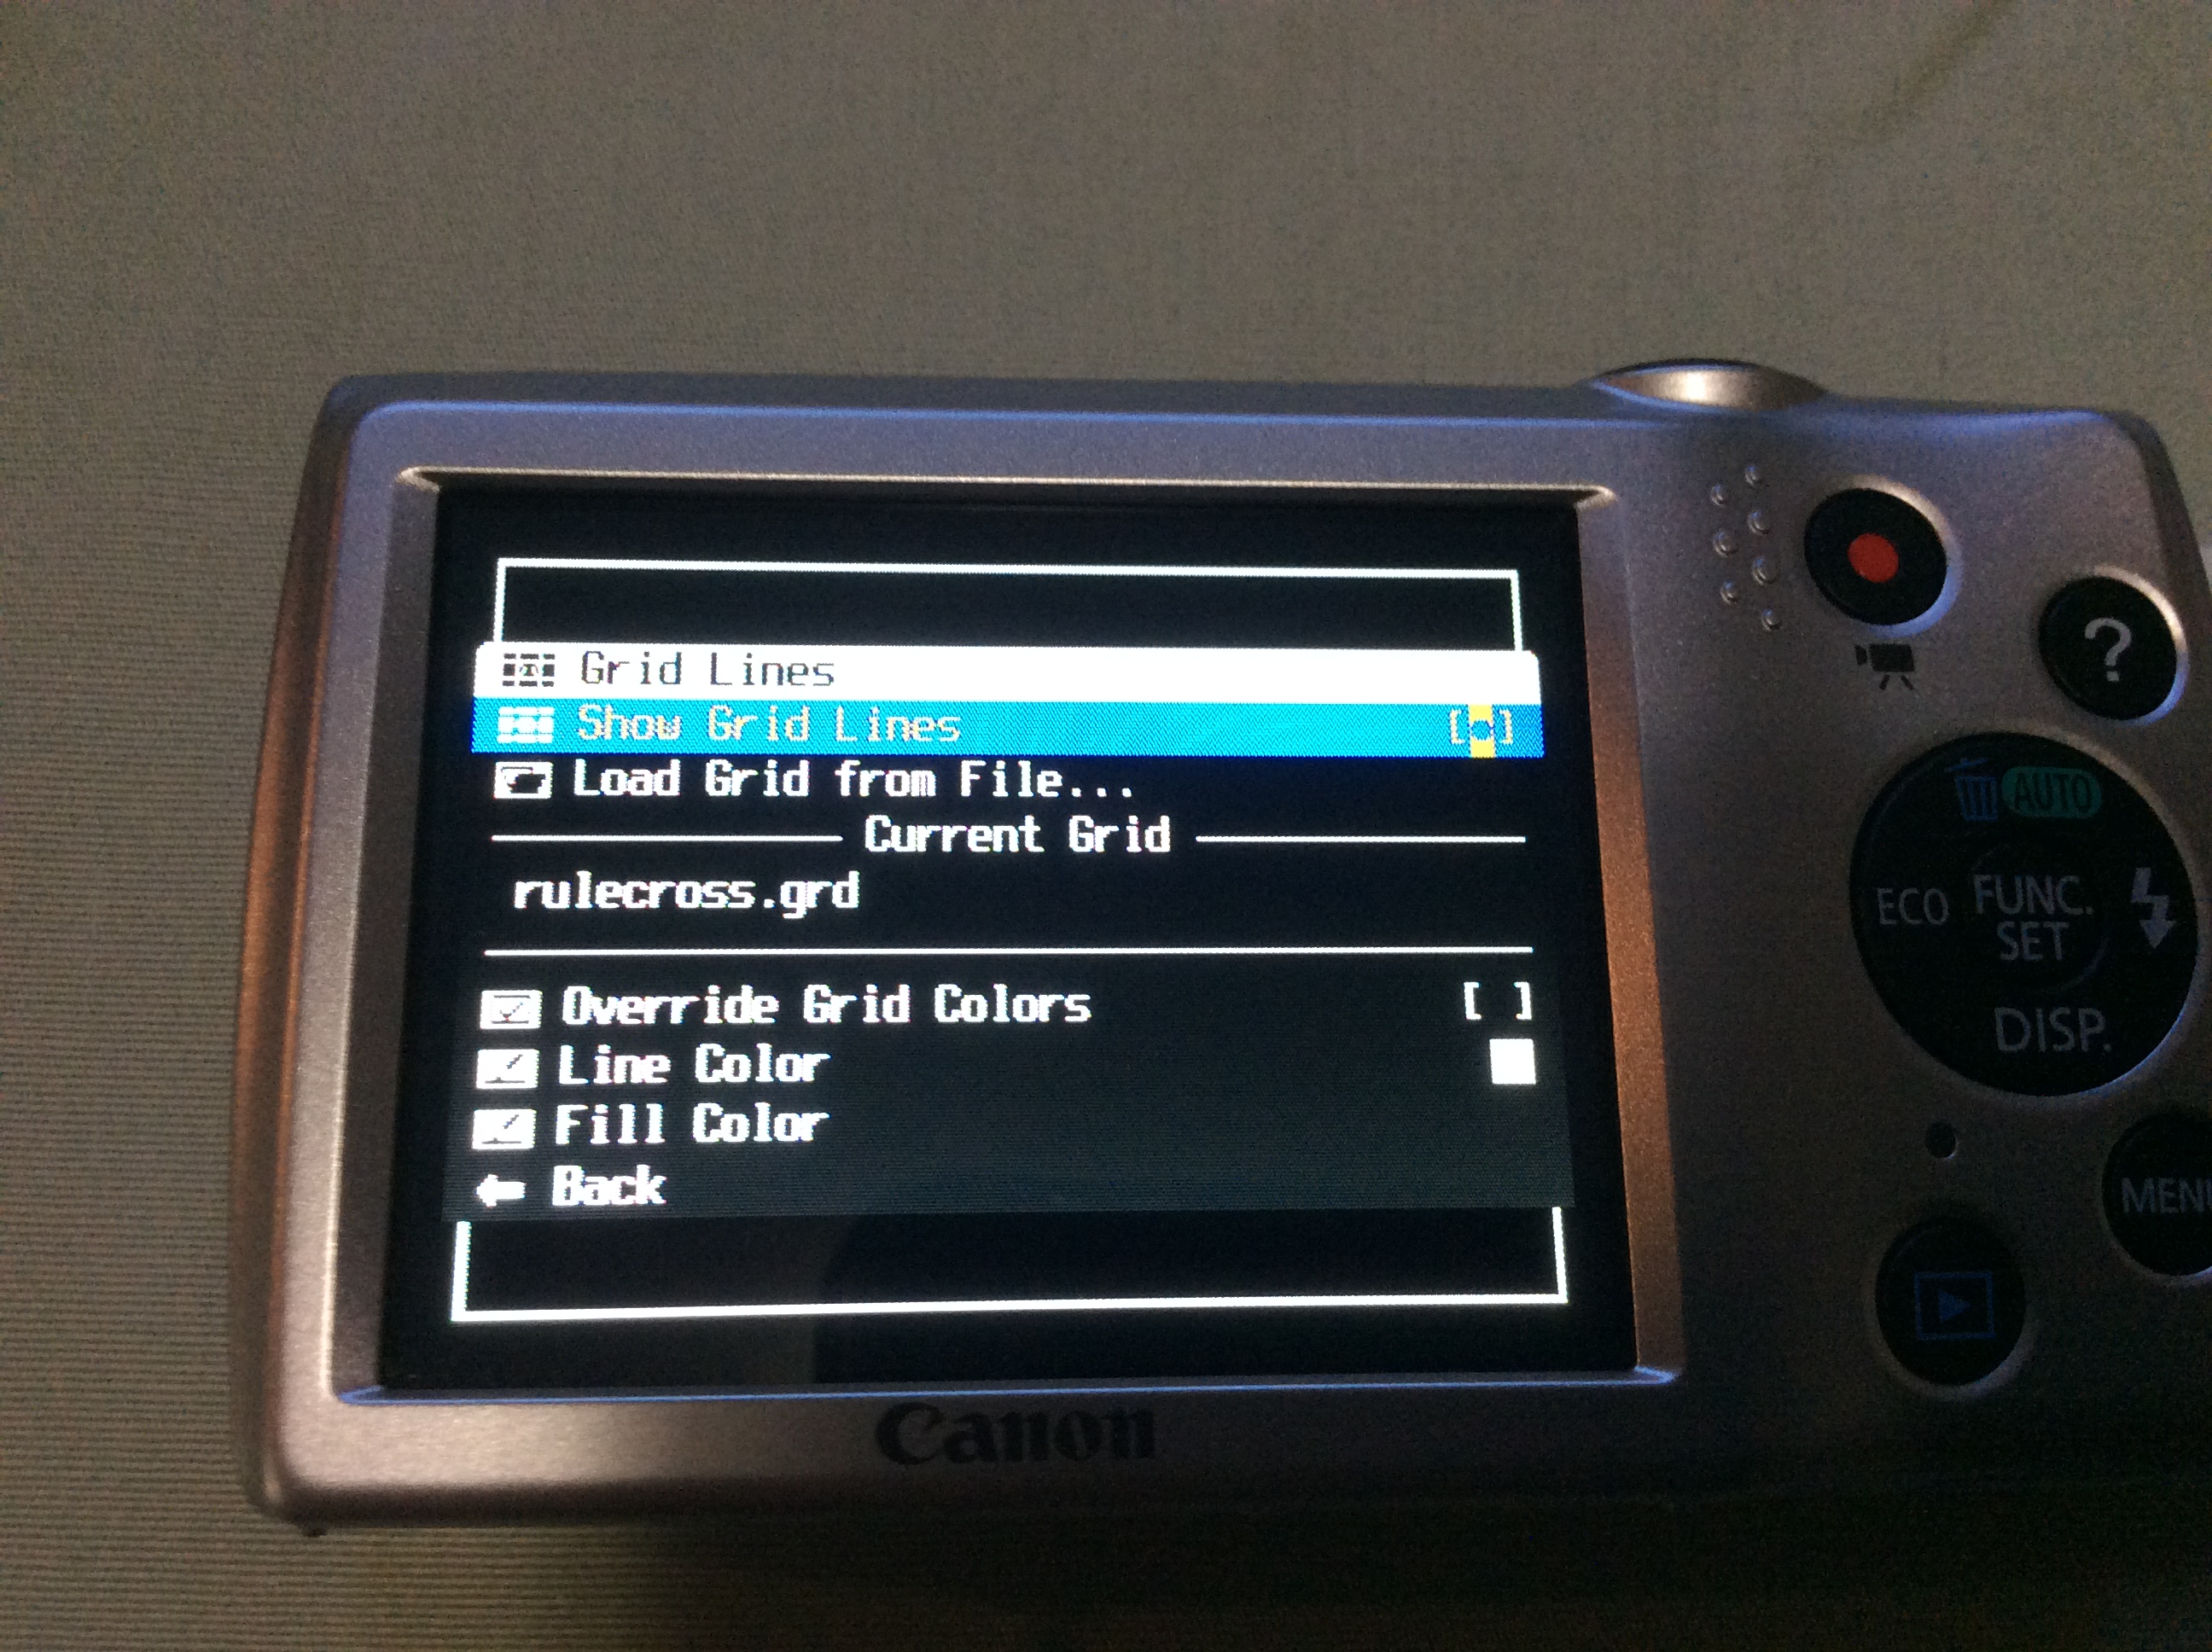
Navigate to 'Show Grid Lines' and press select so that it is toggled on as shown.
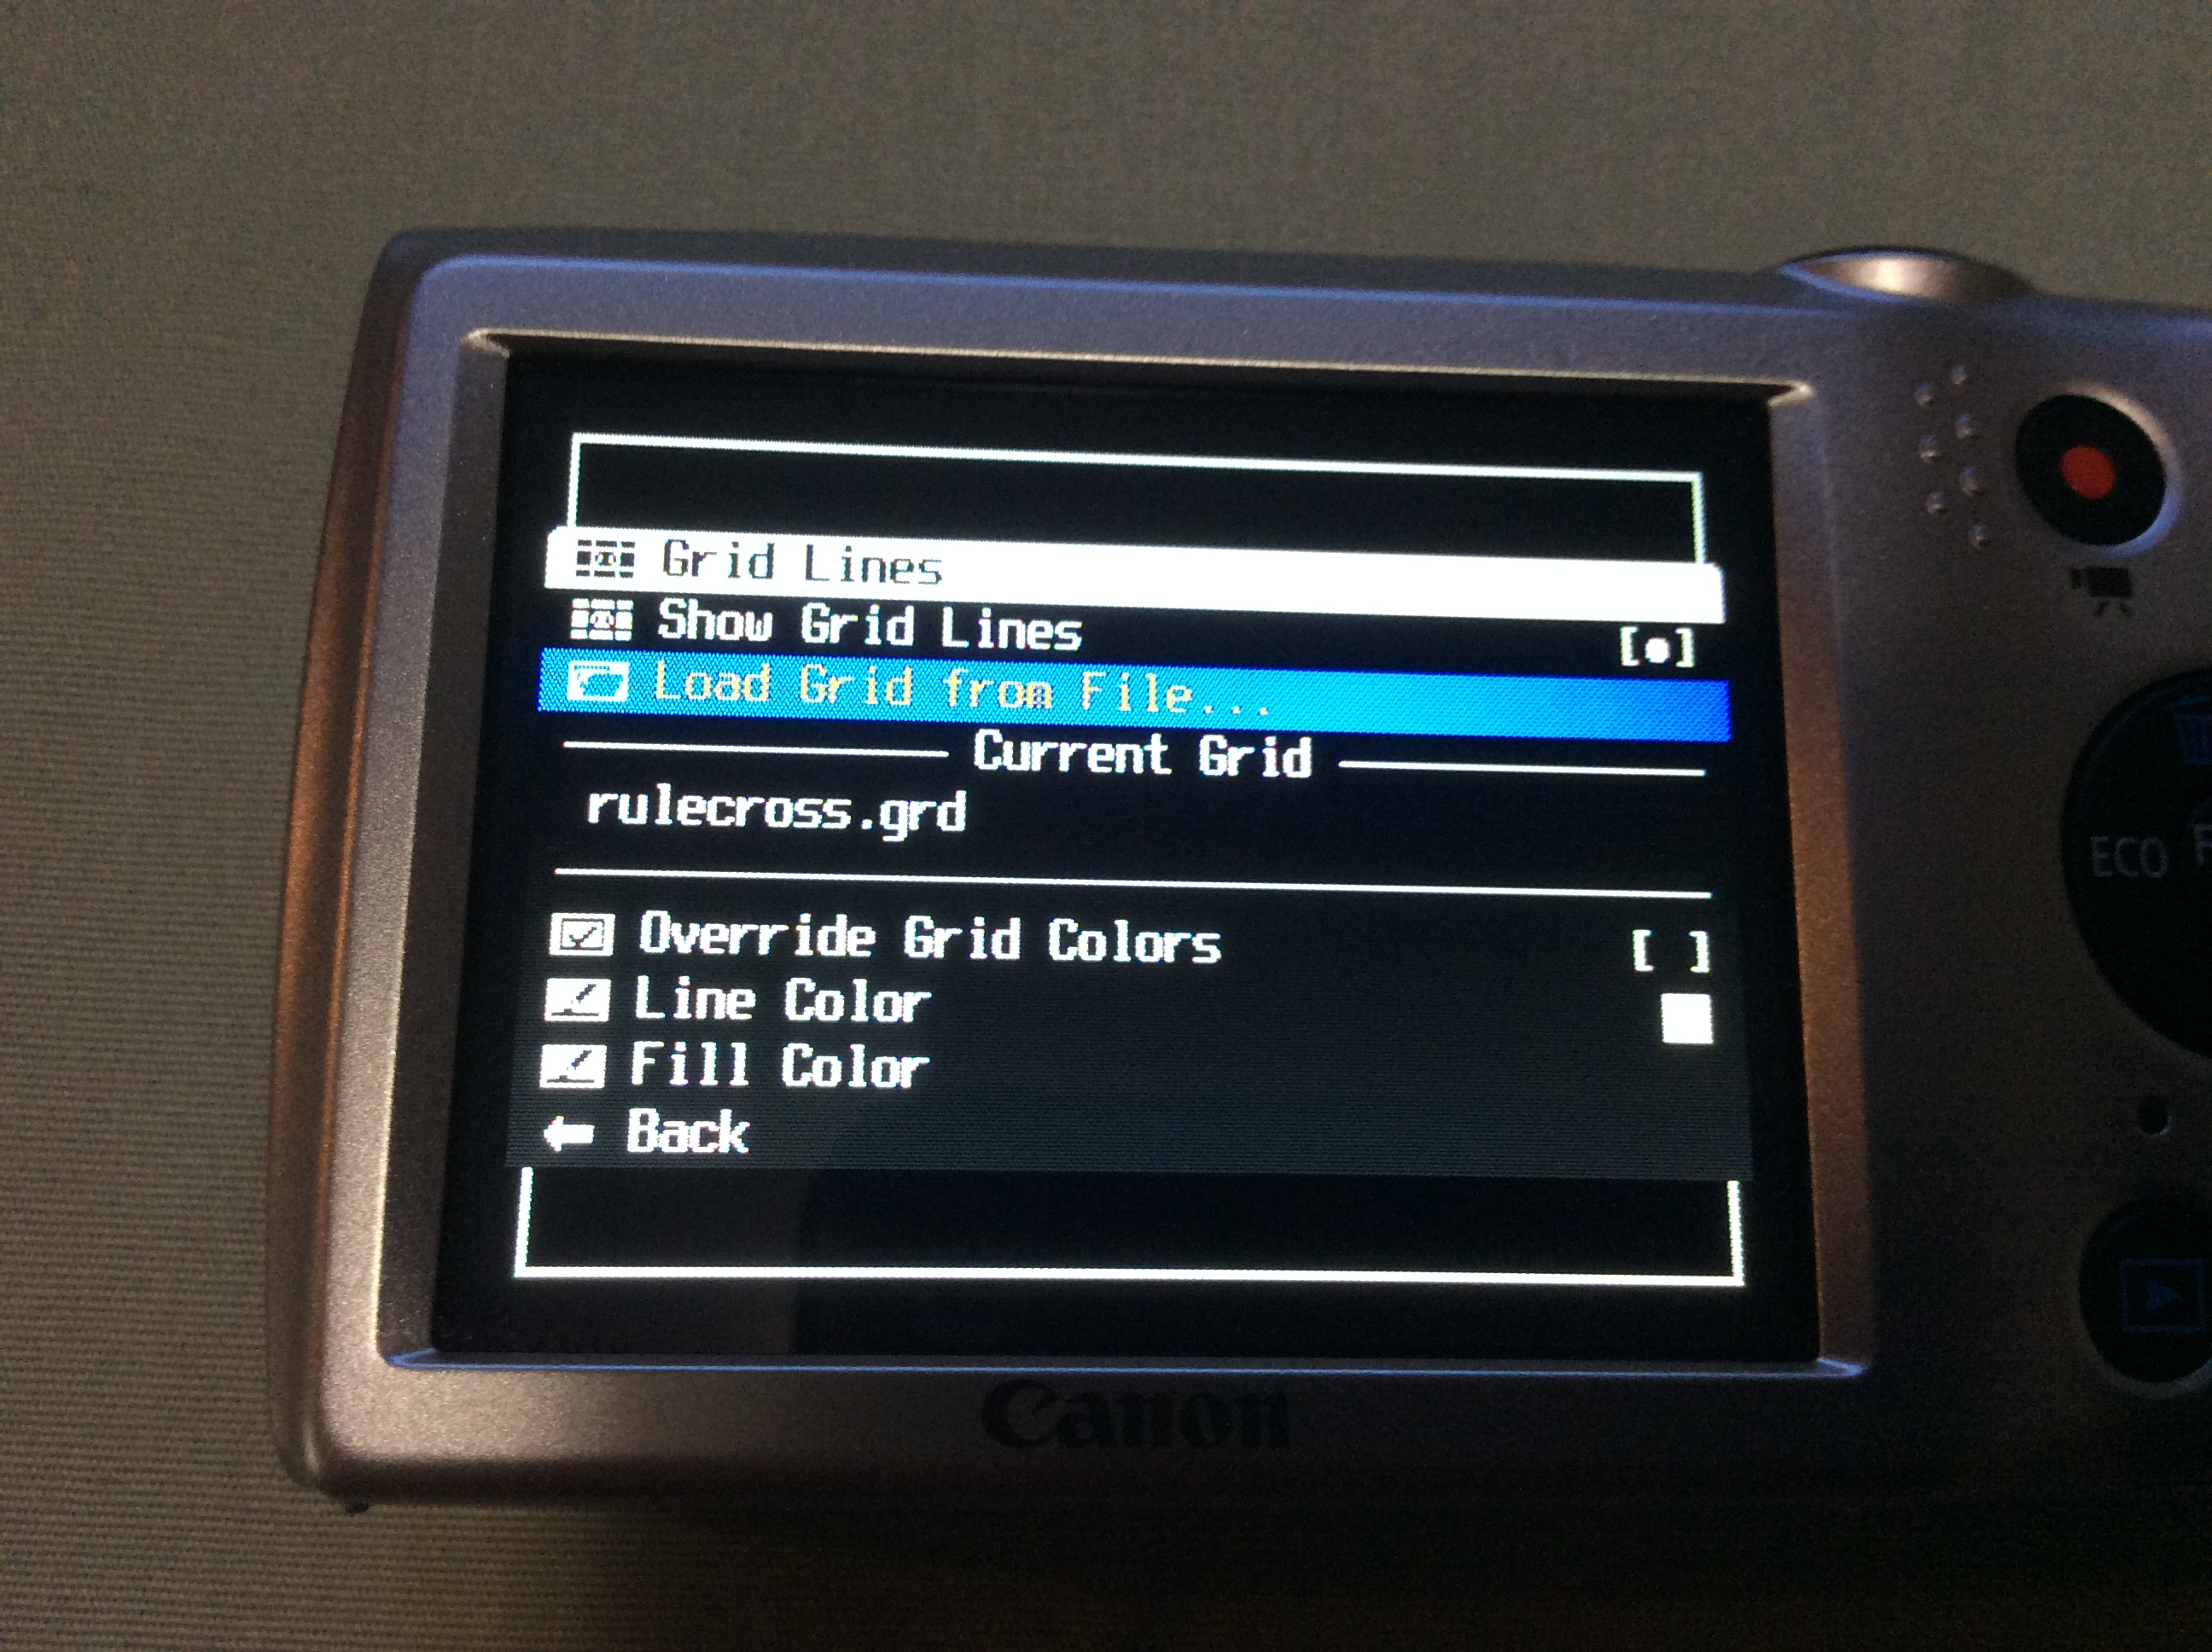
Navigate to 'Load Grid from File...' and select it.
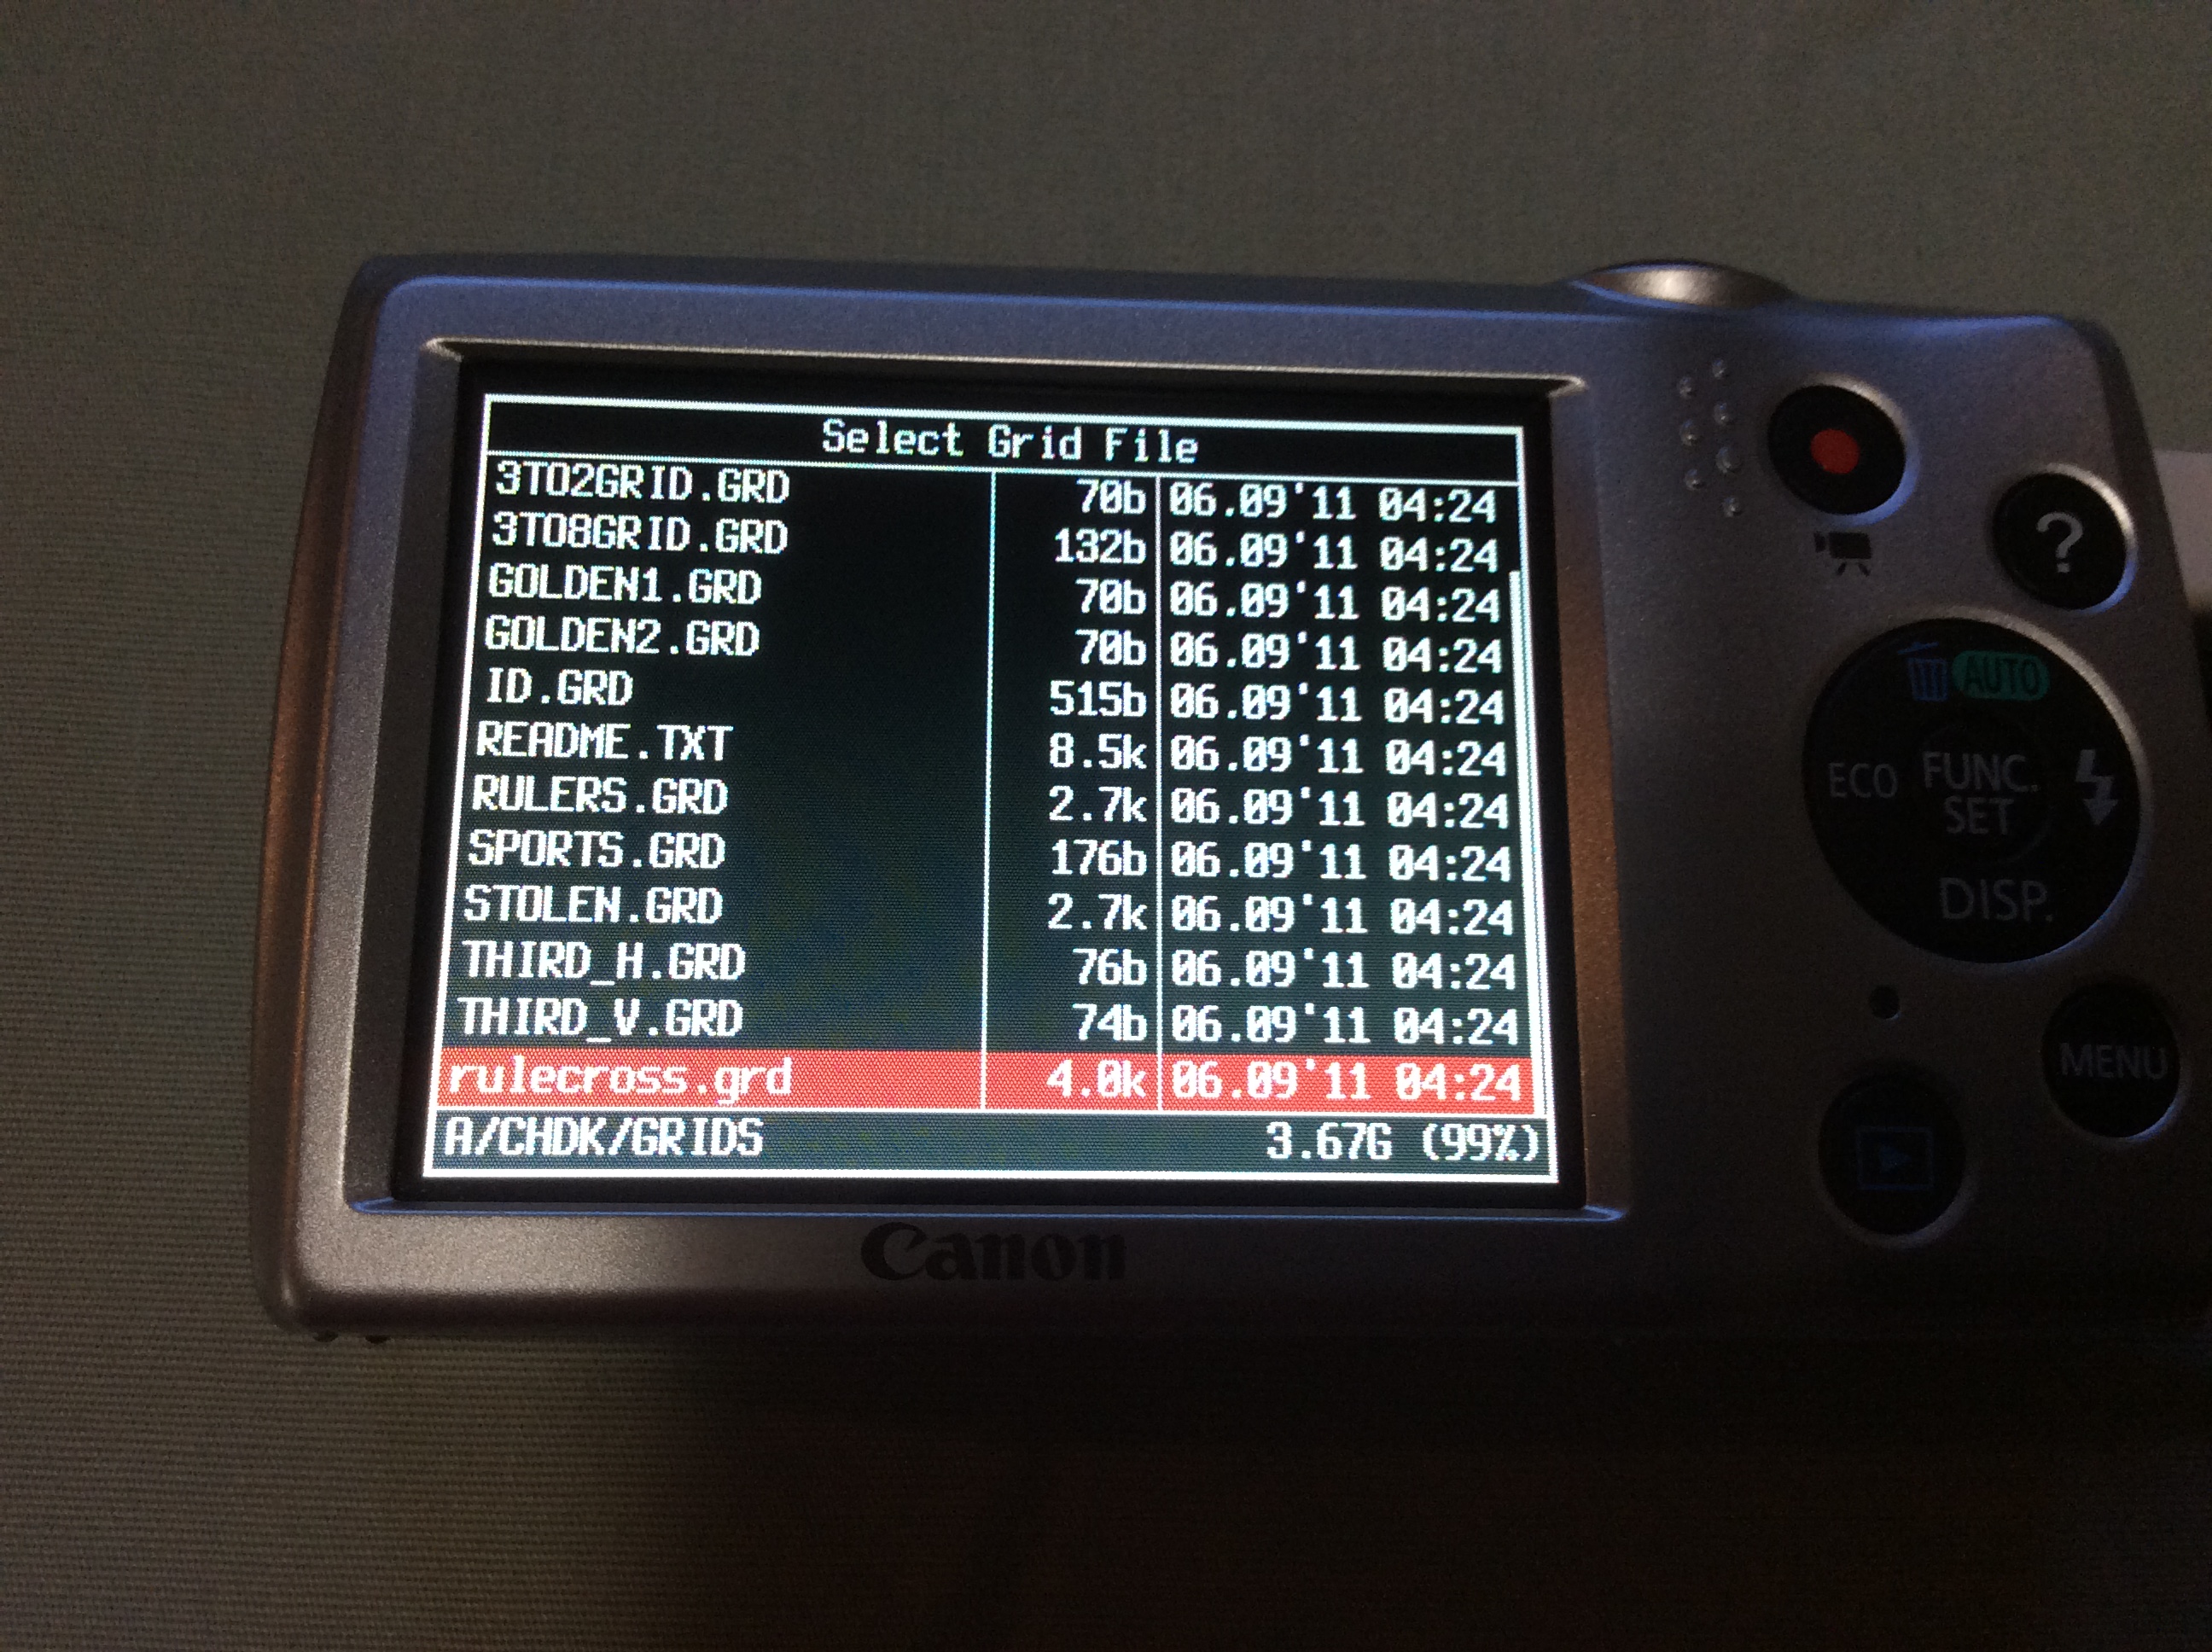
Navigate to 'rulecross.grd' and select it.
Tap the 'Menu' button to close the menu. Press the trigger button to go into shooting mode. After the zoom has extended, you will be able to see a grid and crosshairs on your viewfinder.
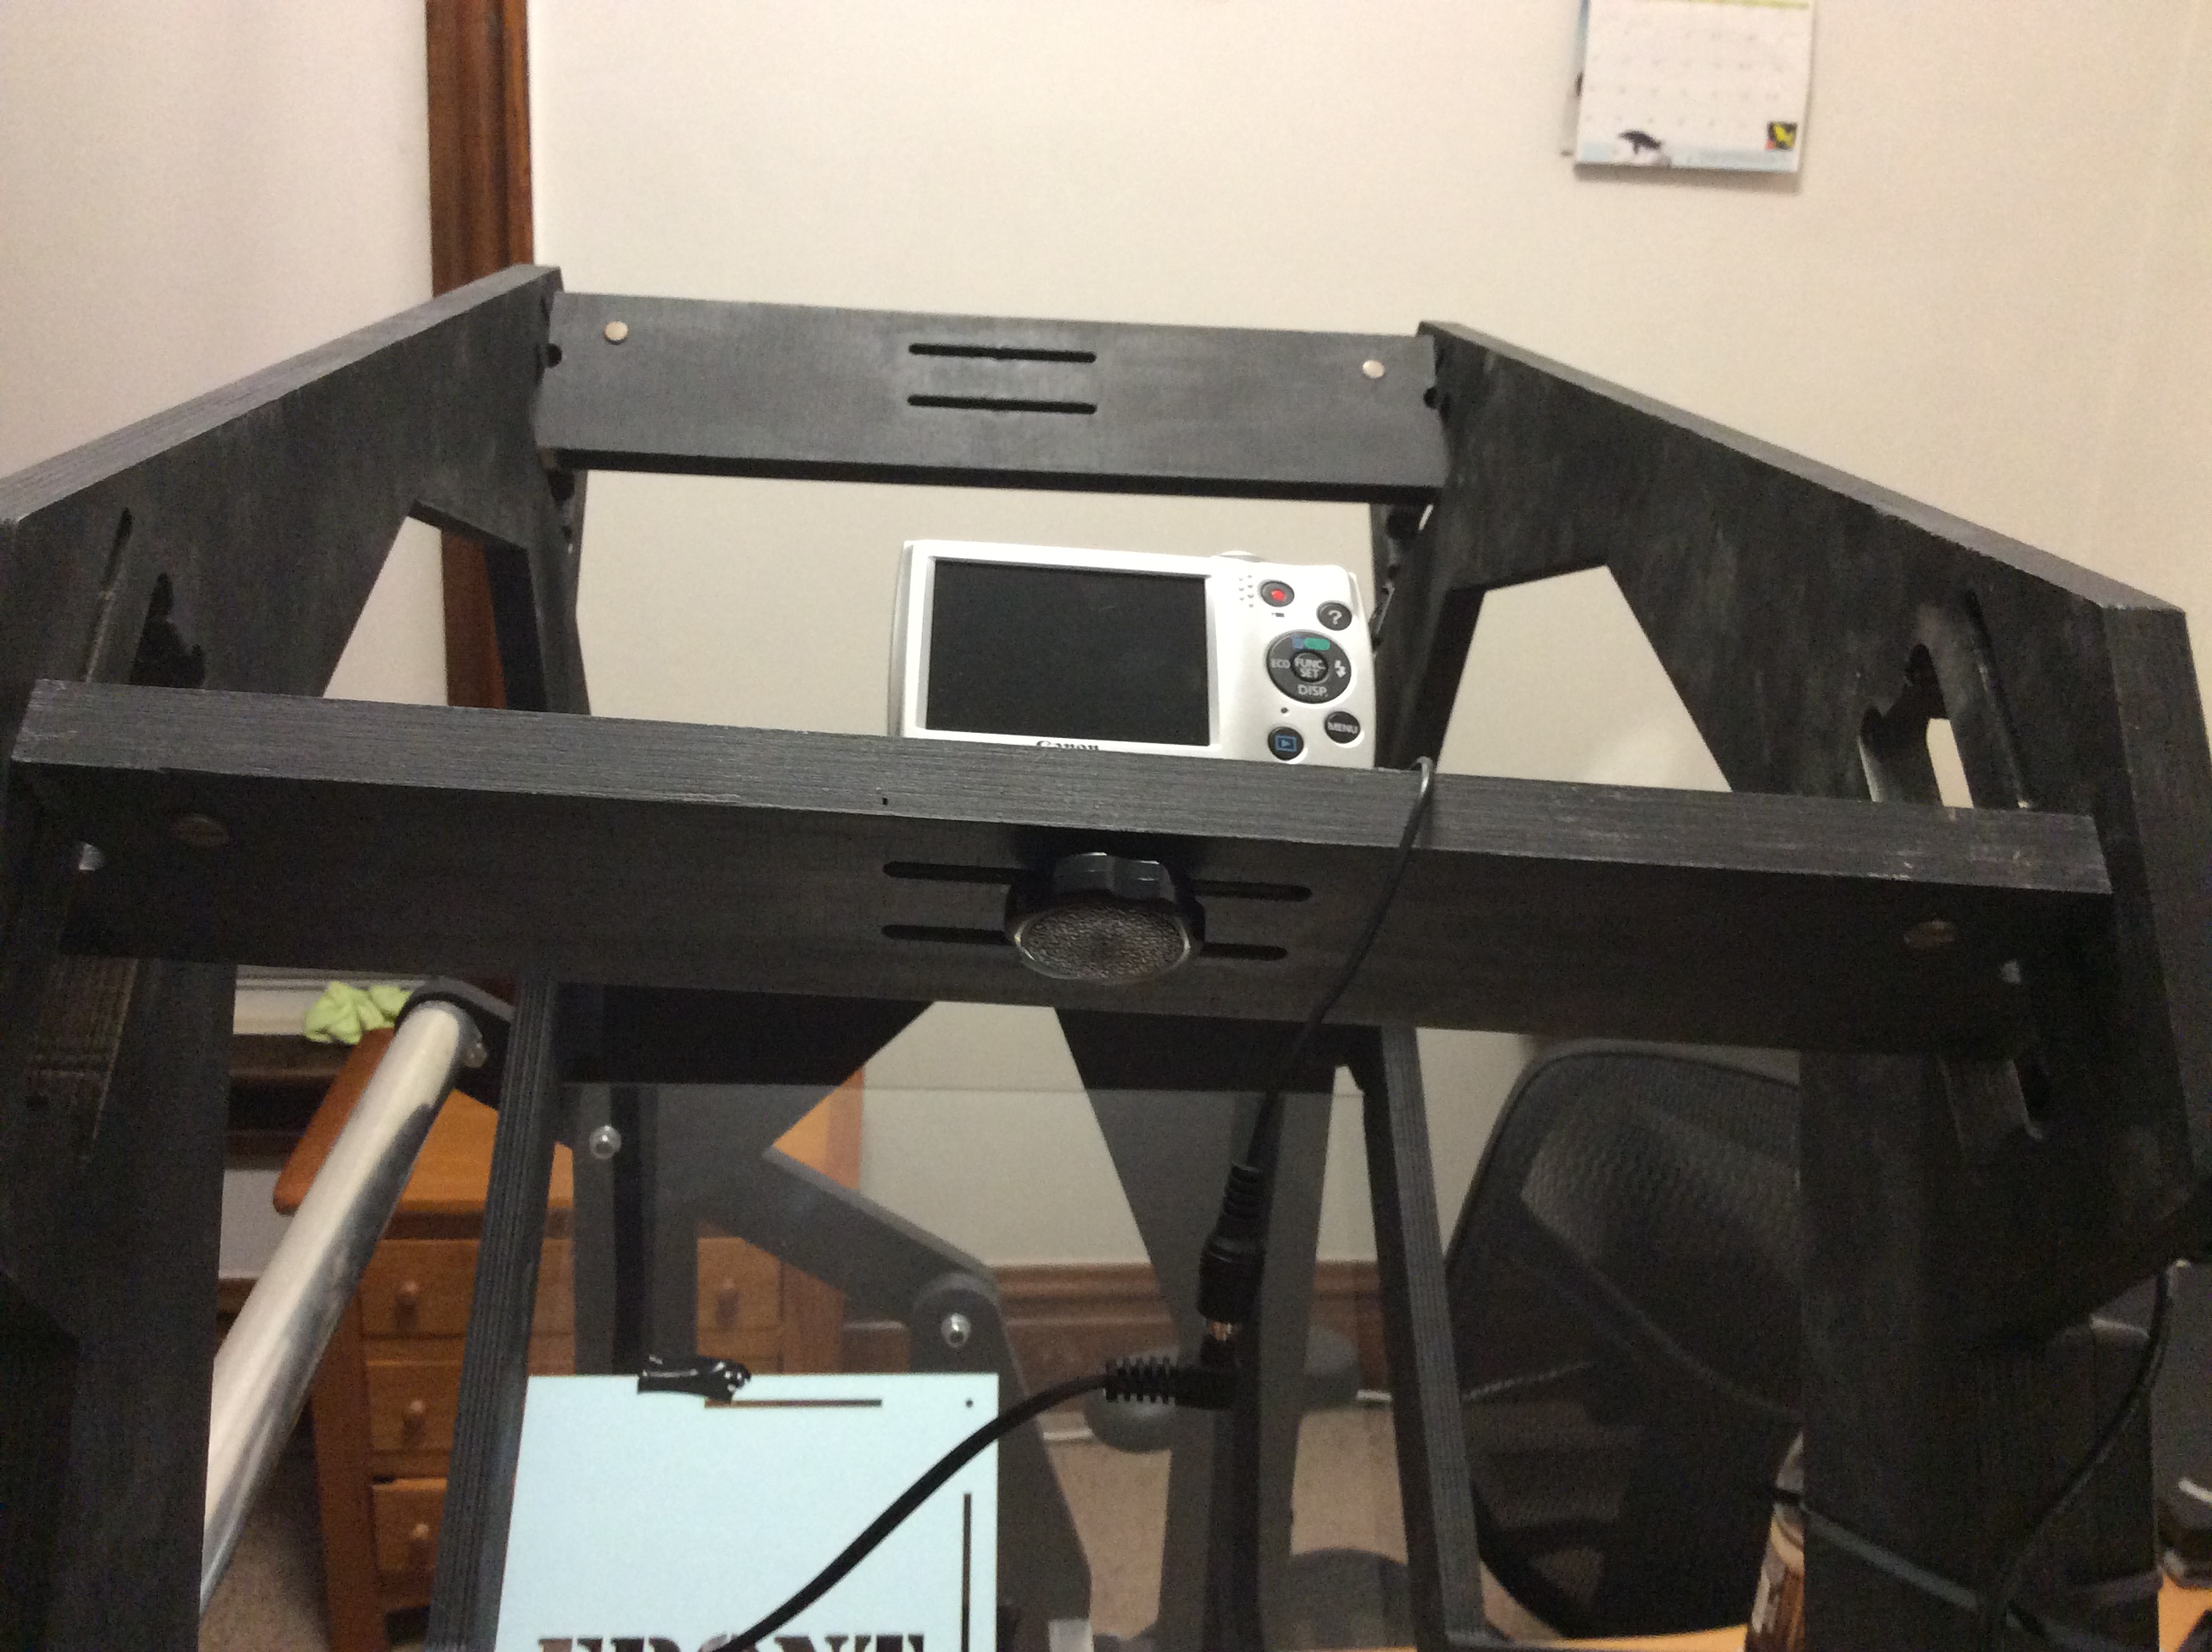
Mount the Camera
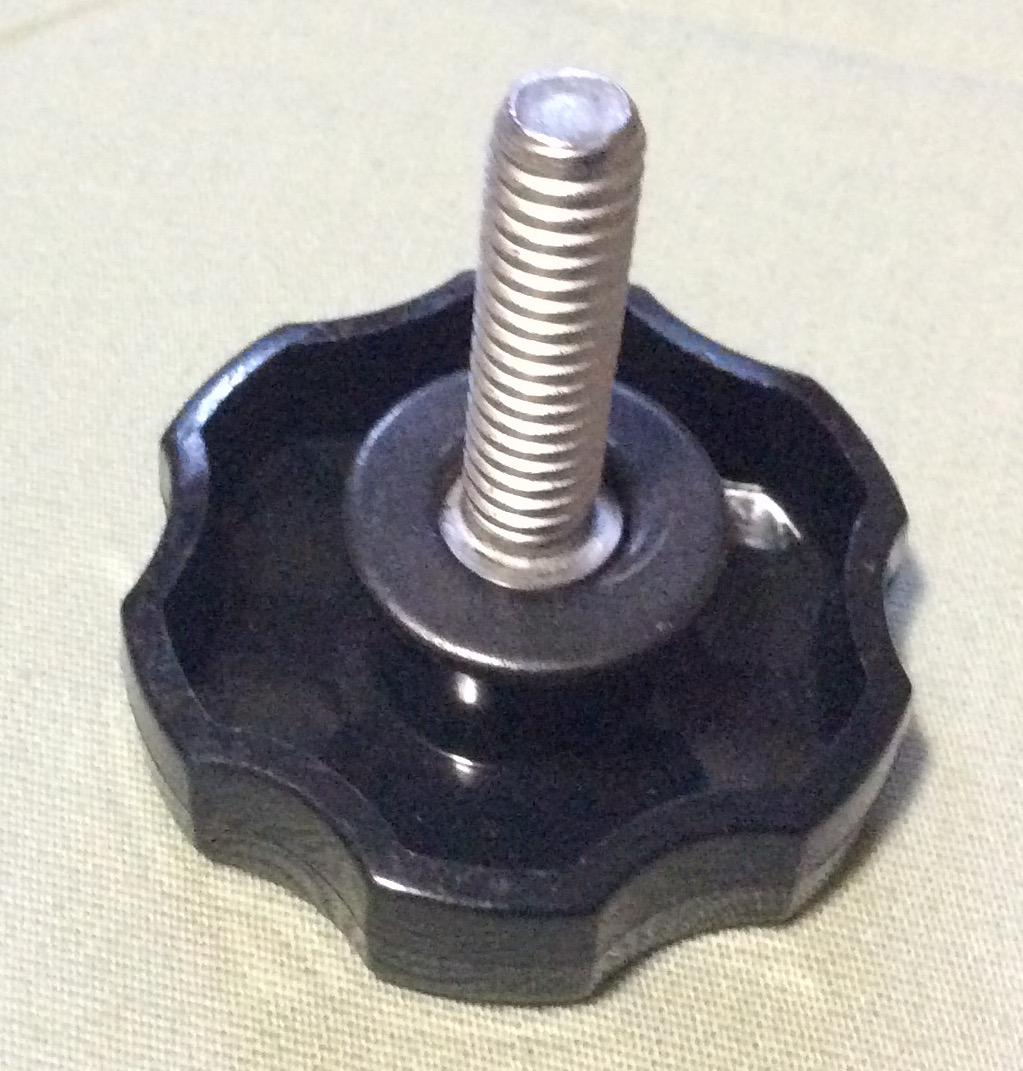
Each camera can be mounted with two washers and the camera bolt that camer with your Archivist kit. First, thread a washer onto the bolt.
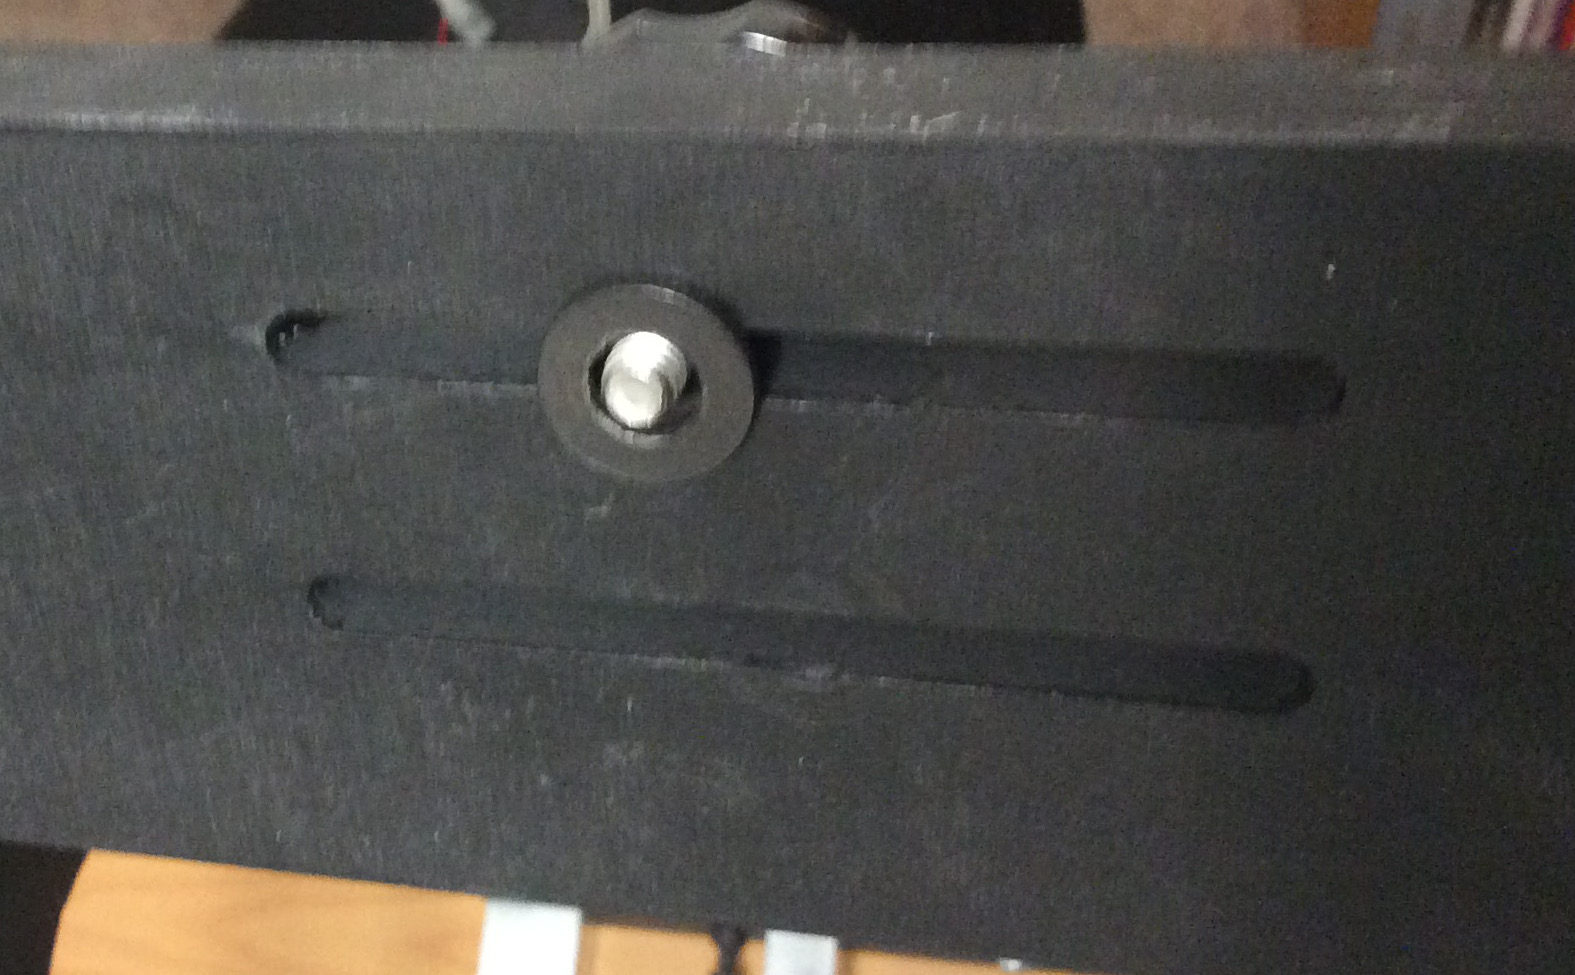
Push the bolt through one of the slots on the mounting board, add the second washer.
Screw the bolt into the camera's tripod mount.
Preparing the Scanner
Make sure your scanner is away from walls and corners. Remove the lighting module. You will also want to place it at a height that lets you comfortably. look at the camera's viewfinder and adjust it.

Place the left alignment card on the platen. Make sure that the card is facing up (so the letters can be read from above) and that the lower-left corner is right at the edge of the visible glass on the platen.
Once in position, tape the card in place.
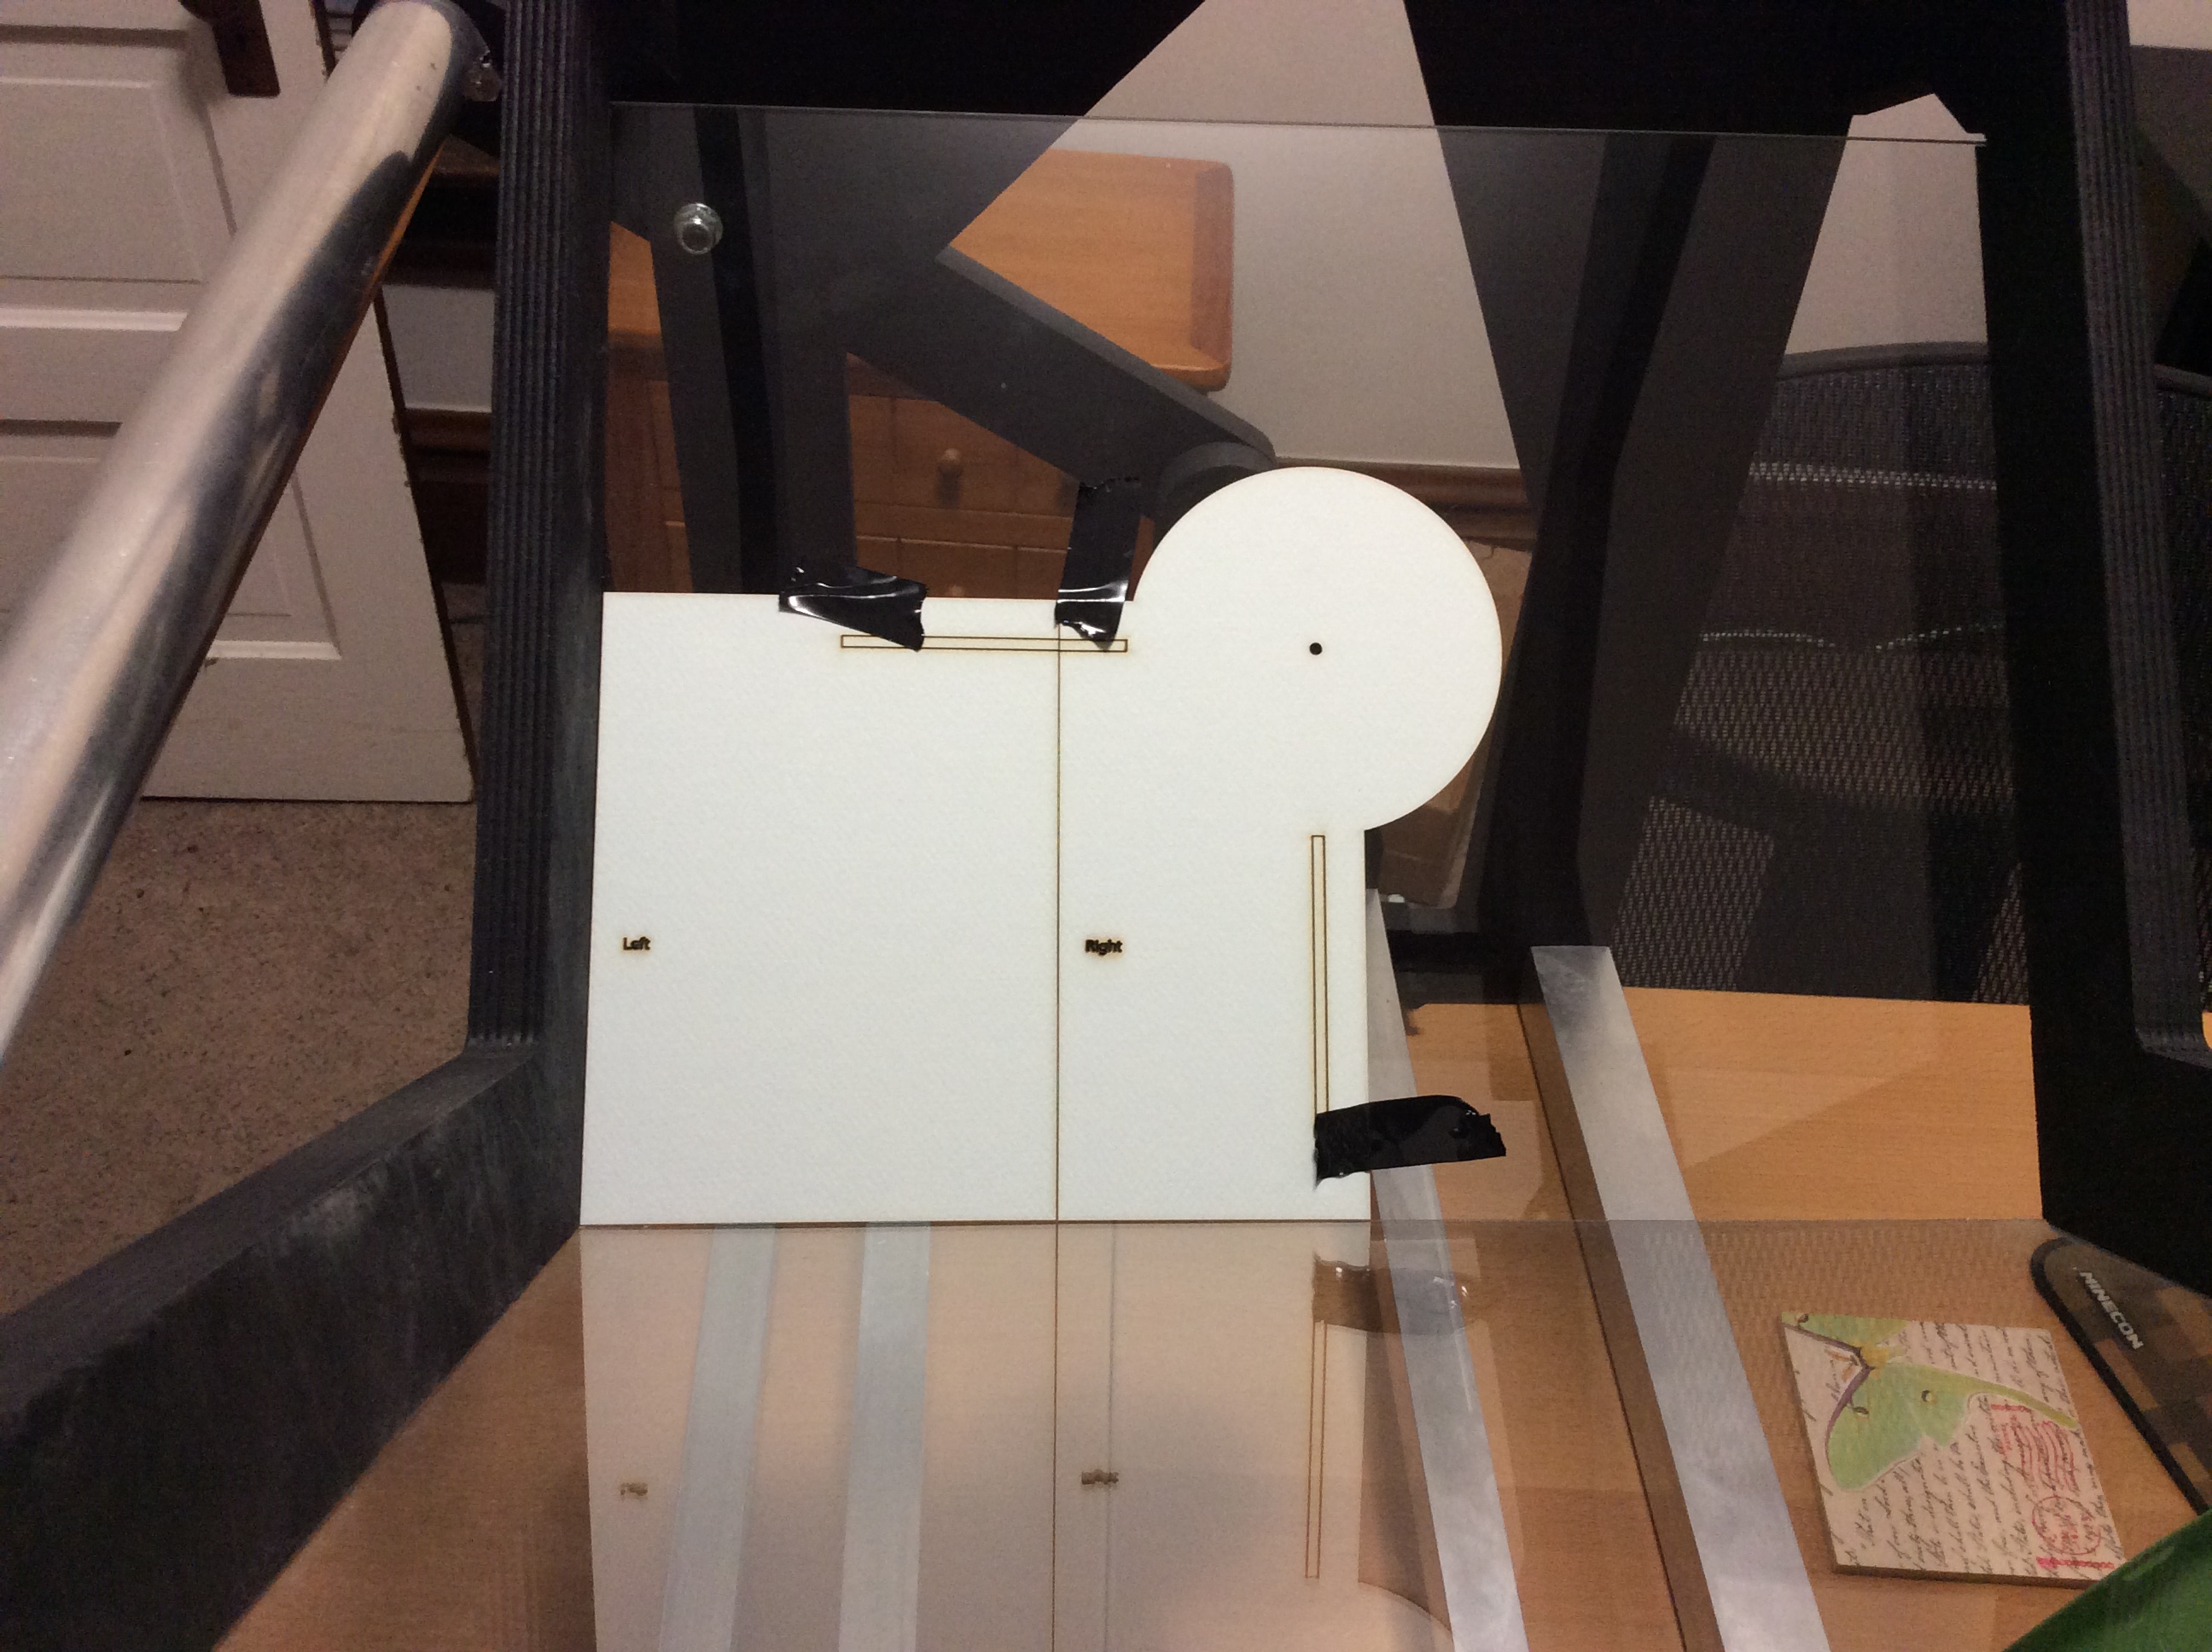
Place the right alignment card on the platen just to the right of the first card. The small horizontal box should line up with the one on the left alignment card. The circle in the top-right is the size and shape of the mirror.
Once in position, tape the card in place.
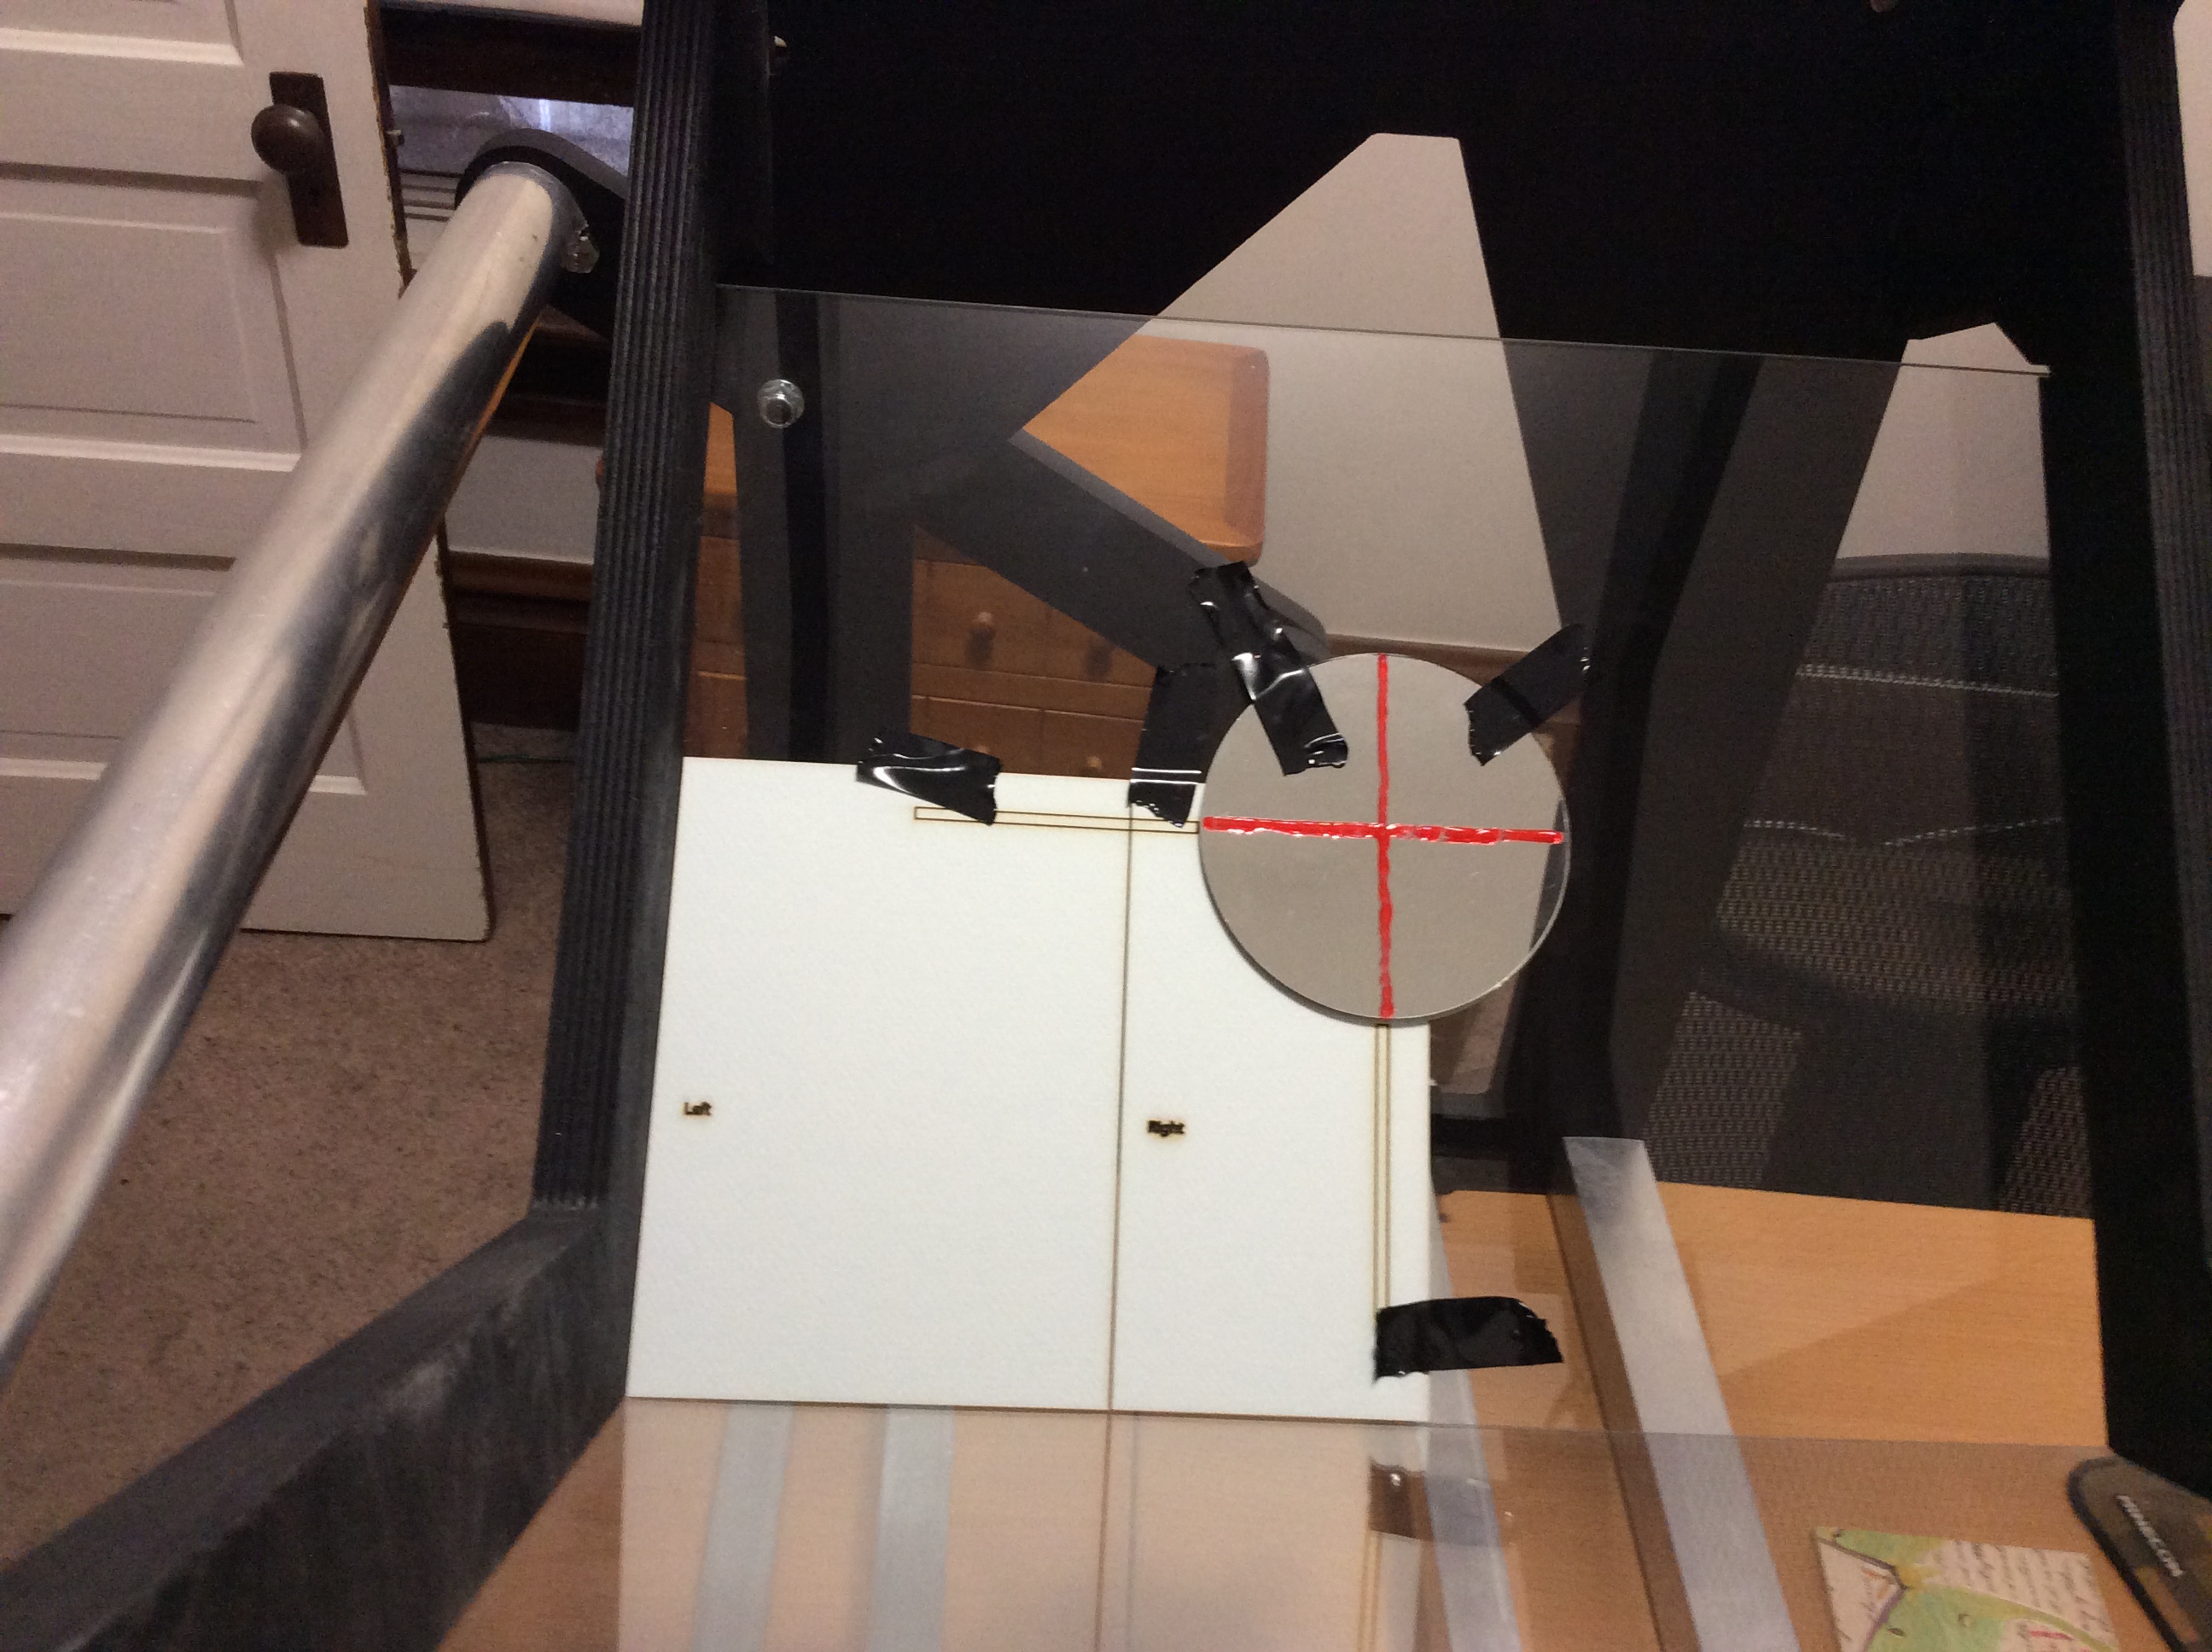
Now you can place the mirror on the platen exactly on top of the circle on the right alignment card. Align the crosshairs painted on the mirror with the horizontal and vertical boxes on the card.
Once in position, tape the mirror in place.
Aligning the Camera
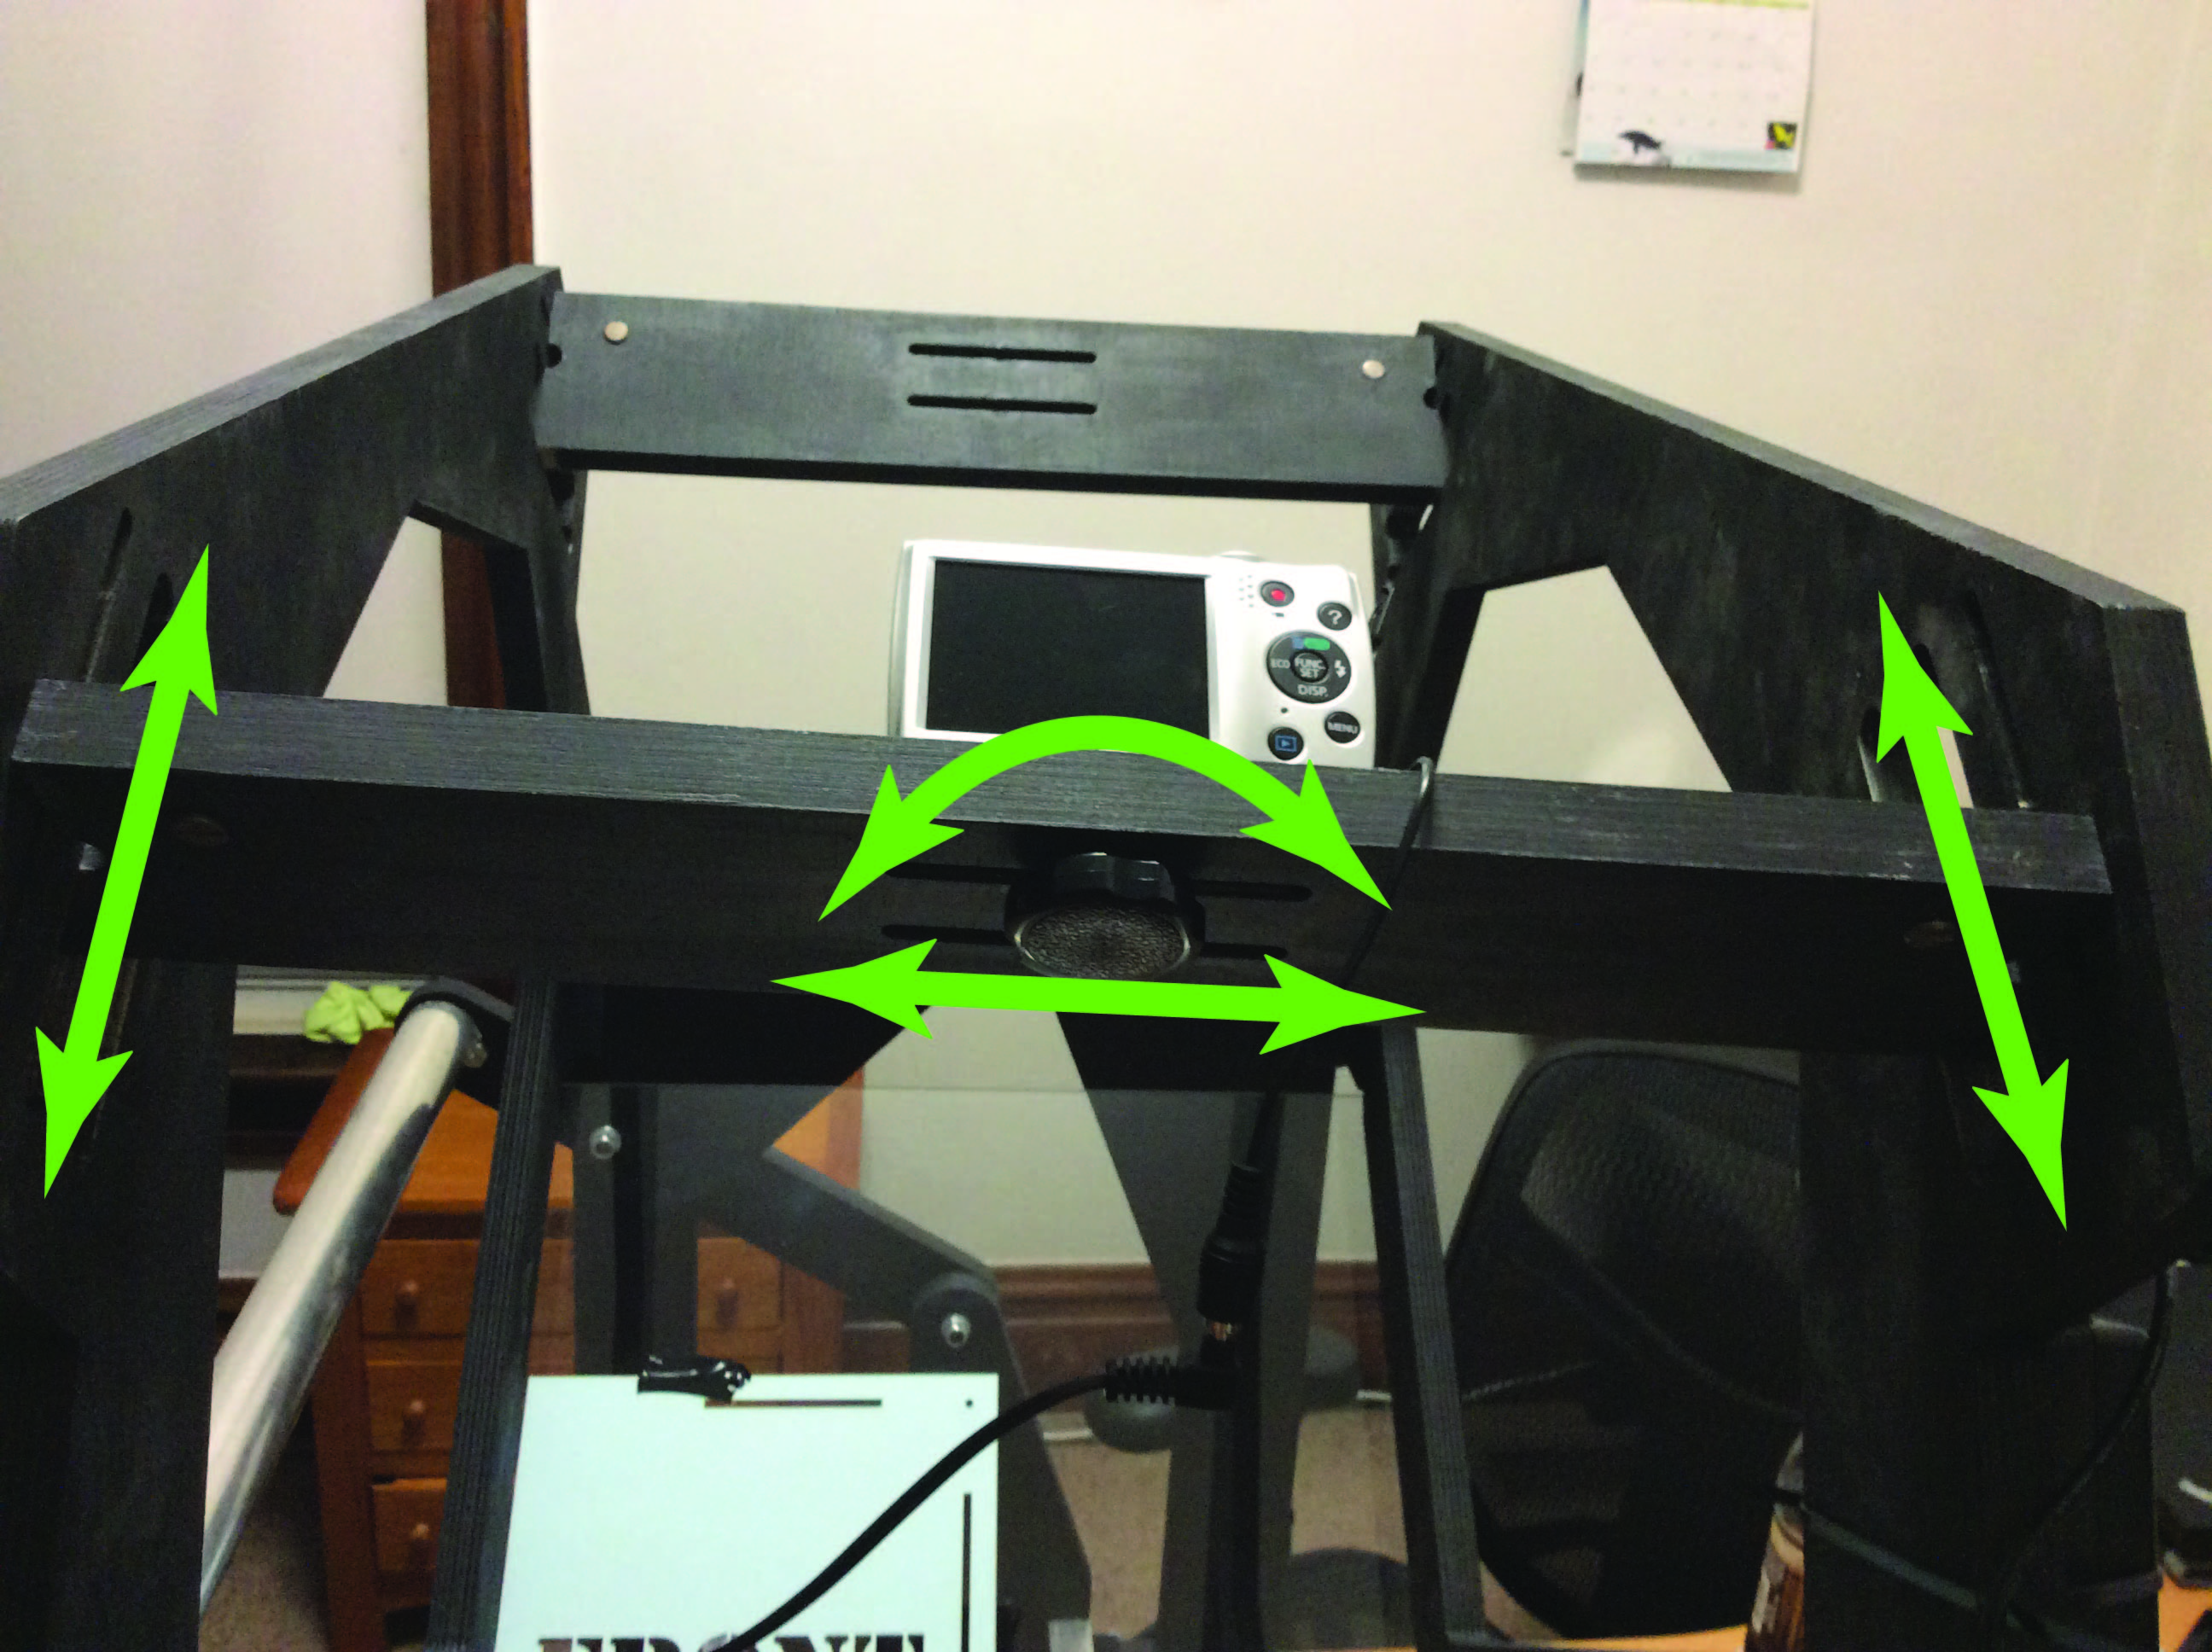
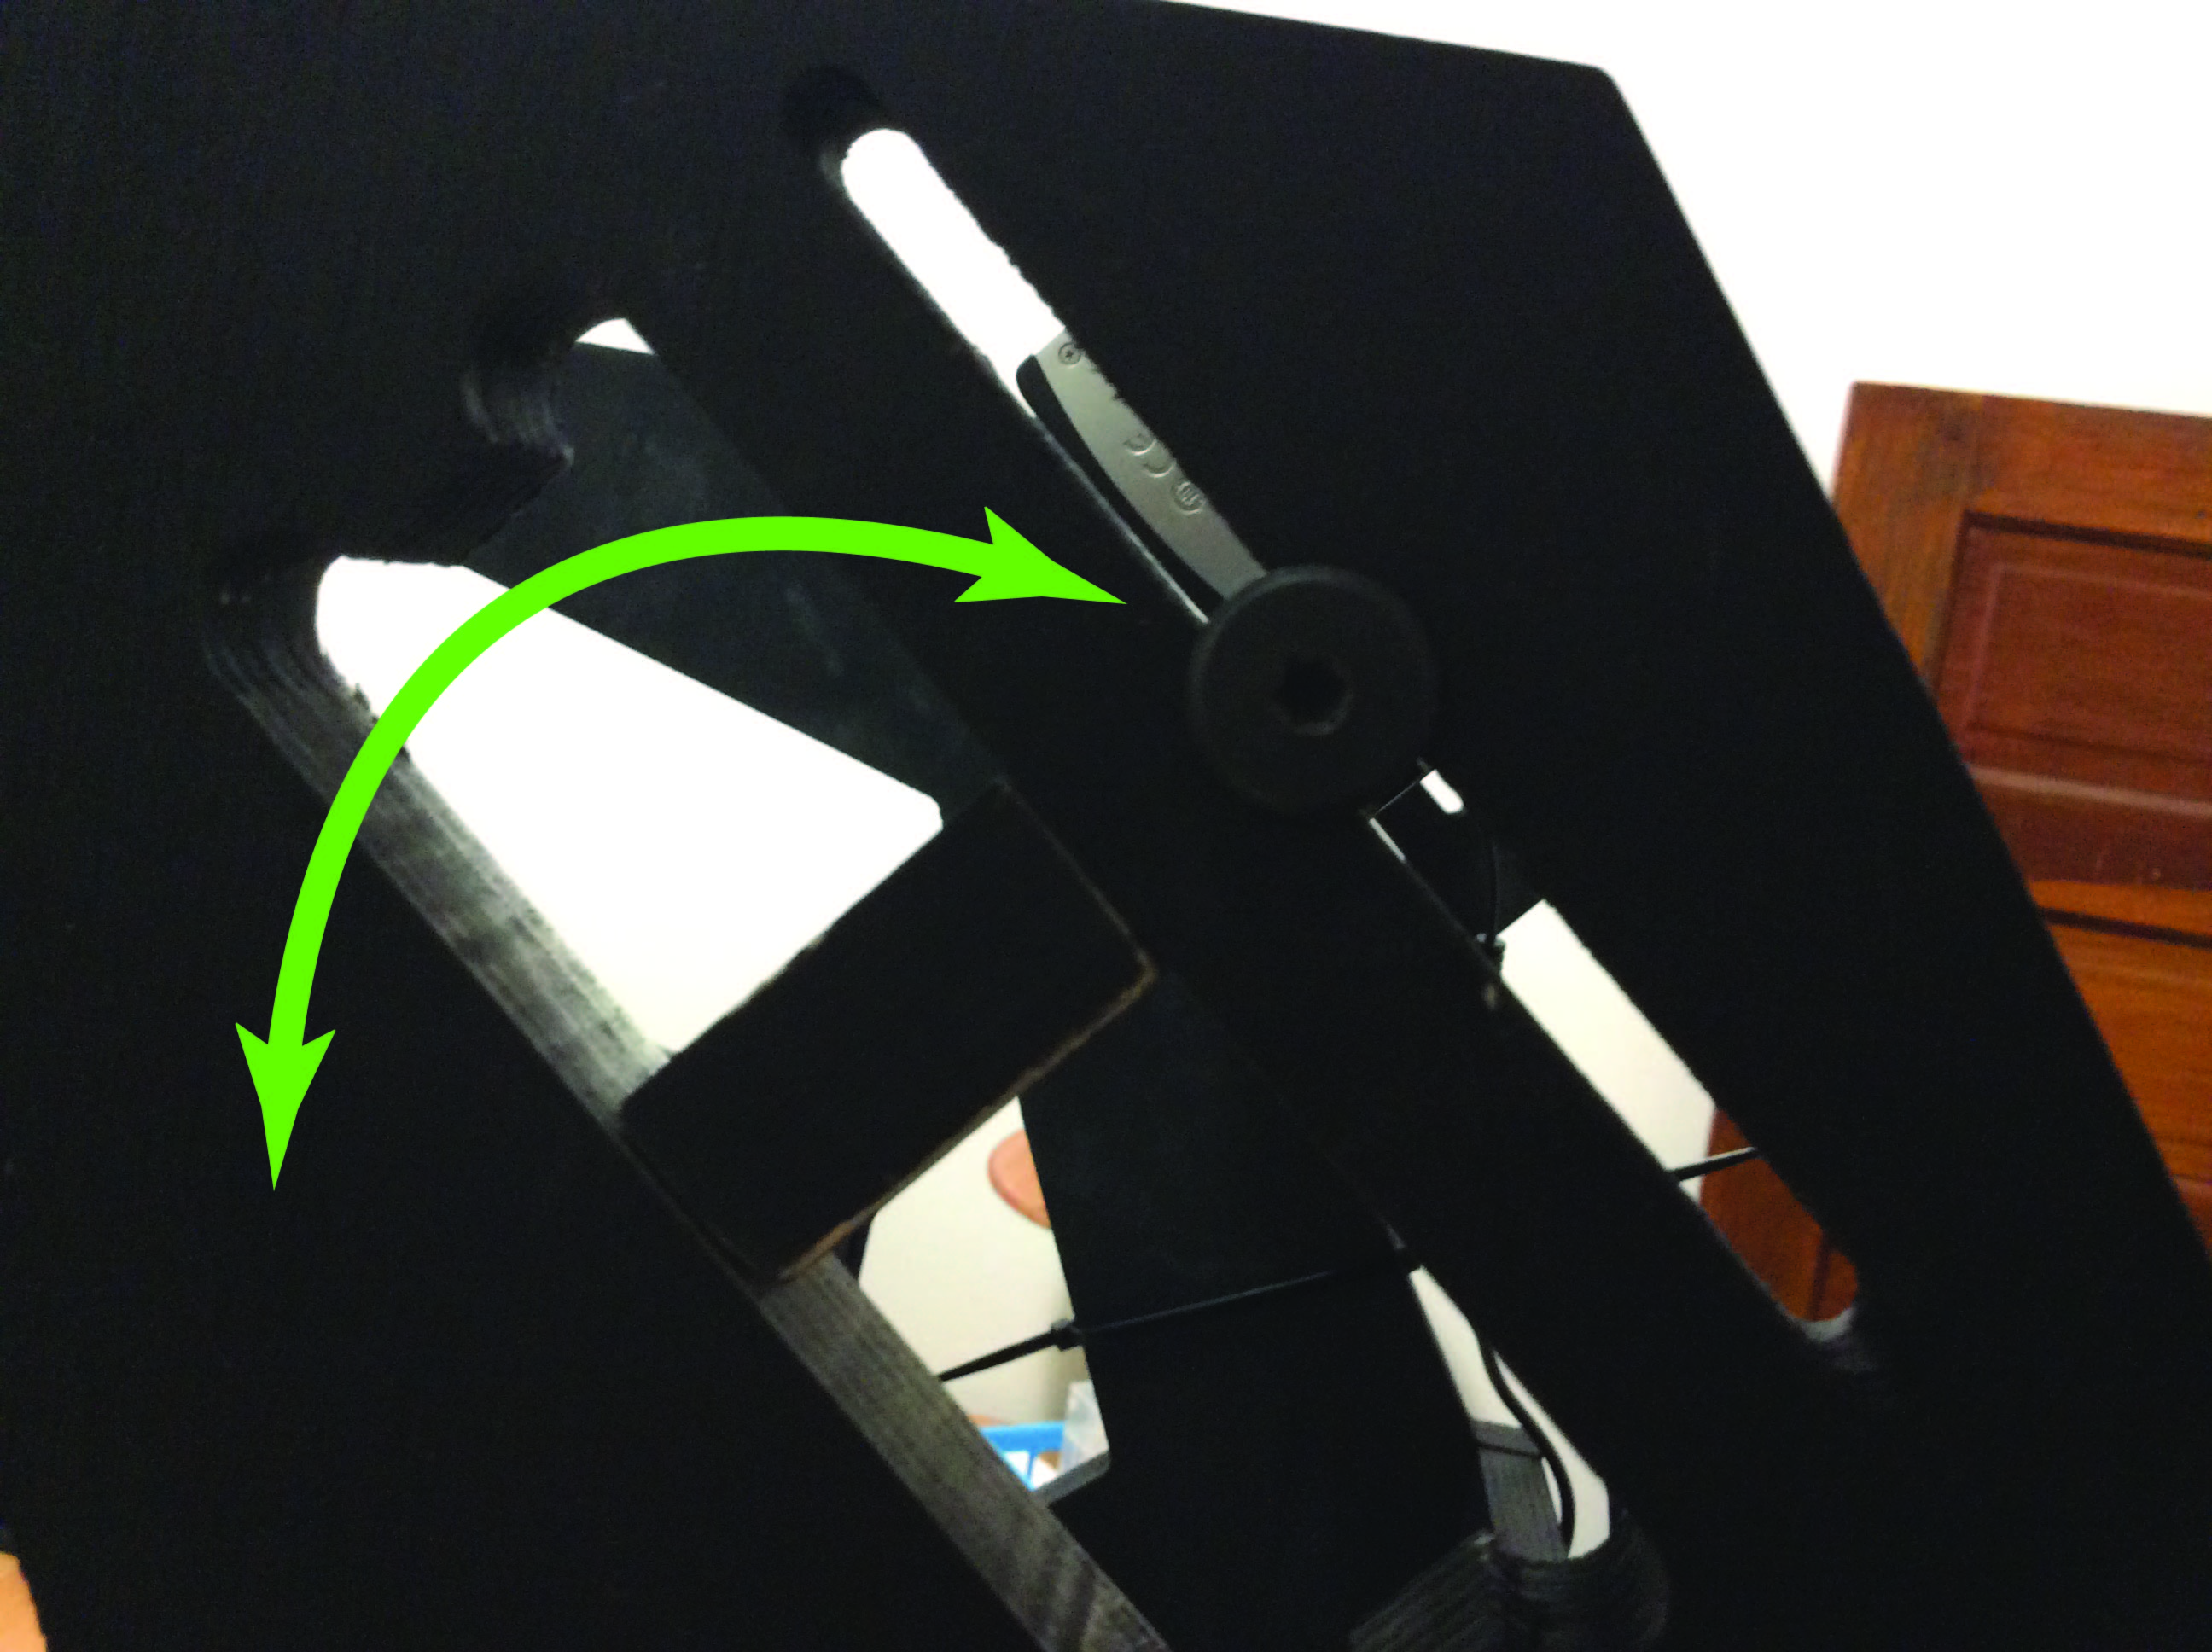
The camera has a number of degrees of motion. Loosen the mounting bolt and the furniture bolts at either end of the camera mounting plate. You can now rotate the camera around the bolt, move the camera from side to side in its slot, and move the camera up and down and rotate it by moving the edges of the camera mounting plate.
There is also a little bit of give on the sides of the mounting plate so that the whole plate can be tipped up or down slightly in place when loose.
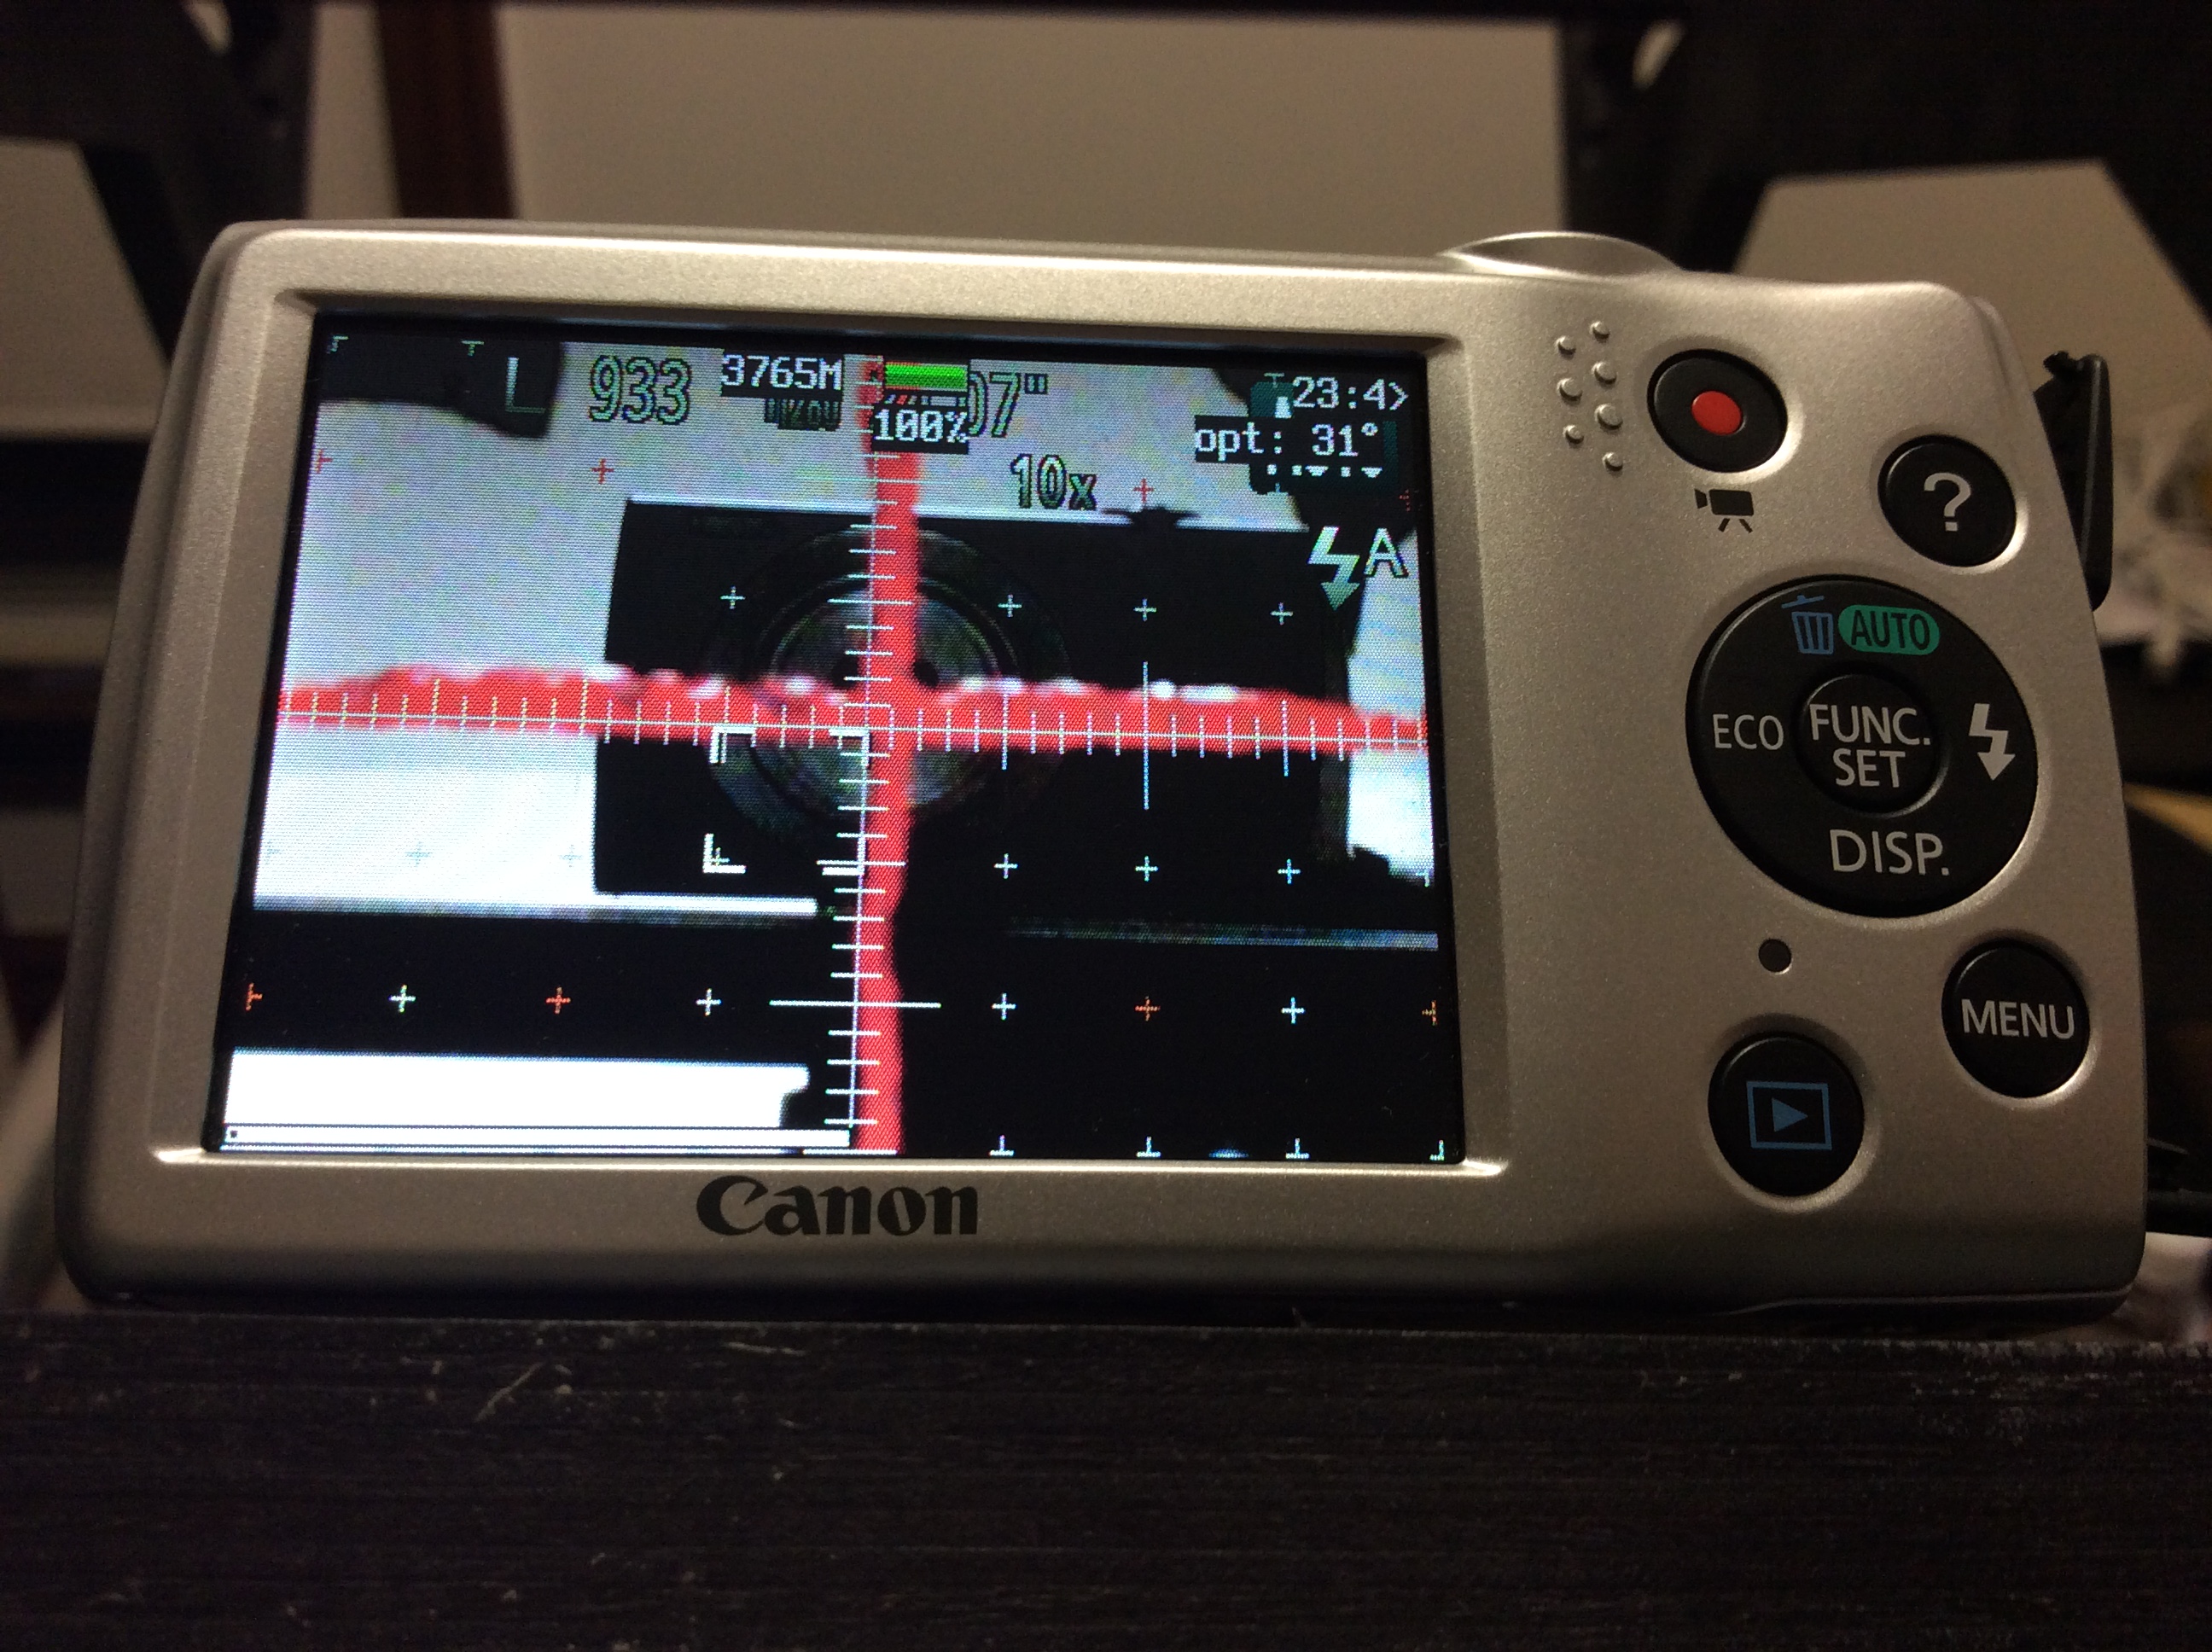
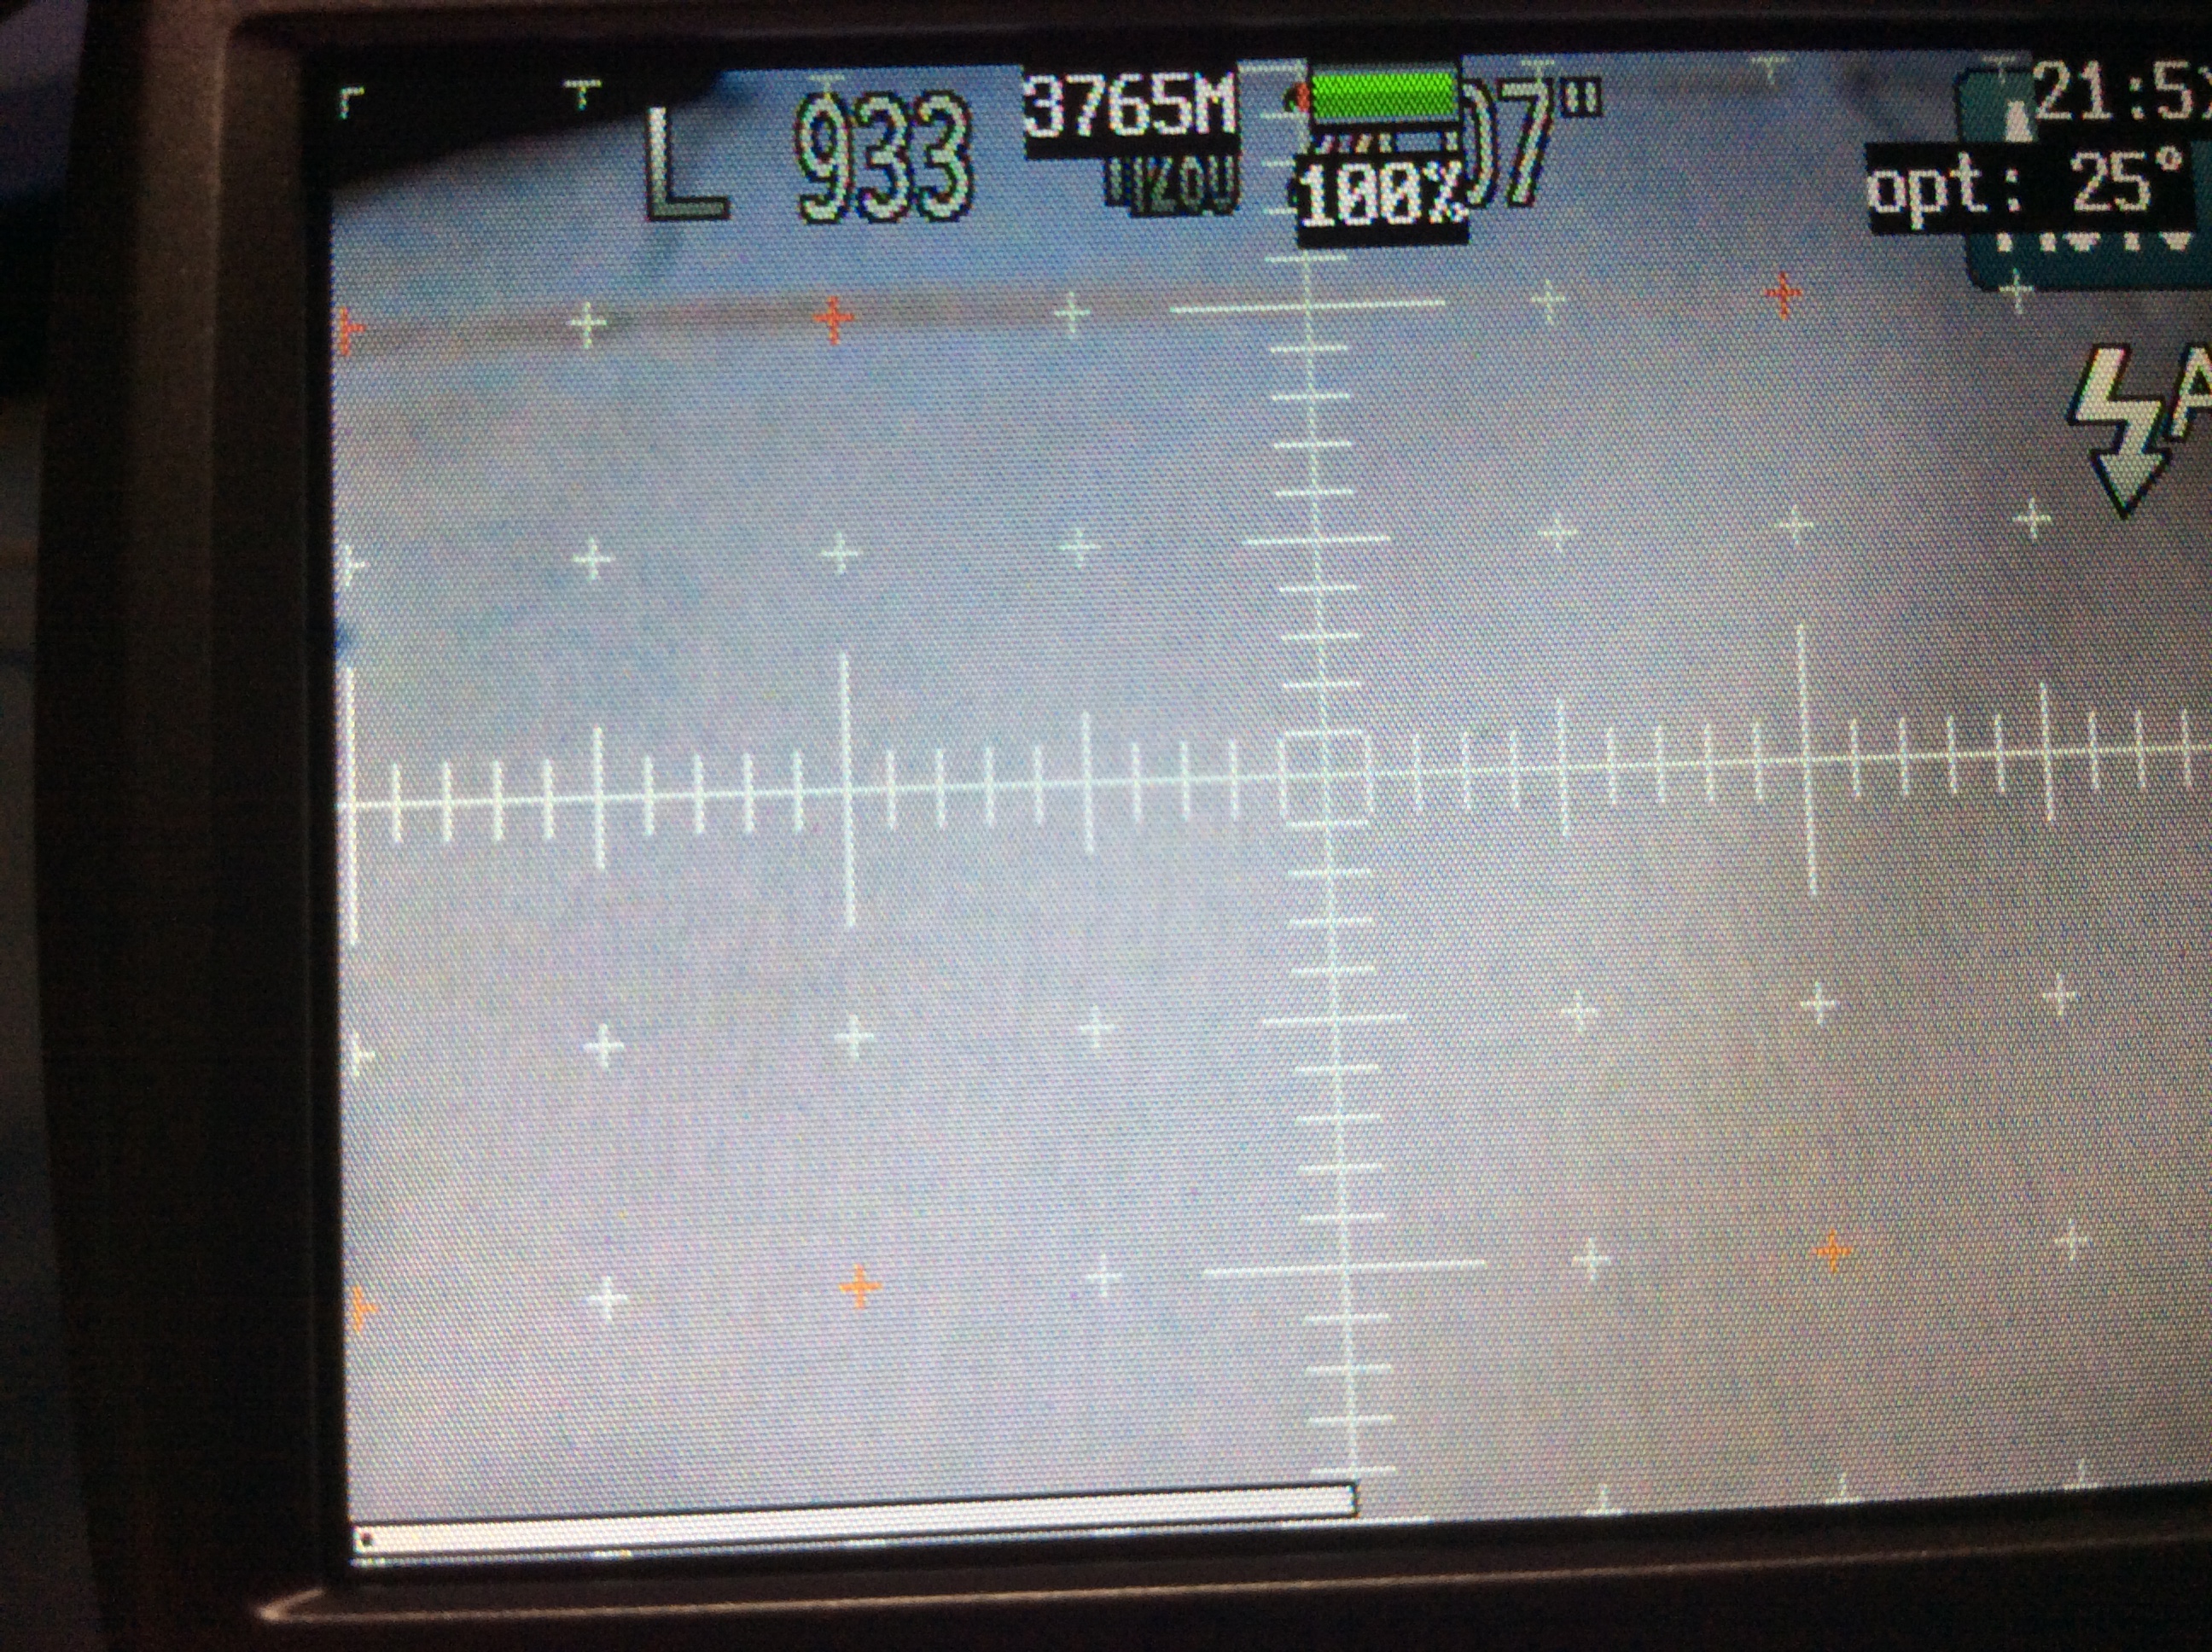
Zoom in the camera as far as it will go. The goal of alignment is to line up three different points. First, the reflected image of the center of the camera lens. Second, the center of the crosshairs painted on the camera. Third, the center of the viewfinder. You also want the crosshairs on the mirror to be aligned with the crosshairs in your viewfinder.
This is a lot of things to line up. I have found the most success by first trying to line up the center of the lens reflection and the center of the crosshairs. At that point, I try to move them both to the center of the viewfinder and check the alignment of the mirror crosshairs.
The image above is fairly close, but you can see that the alignment could be a bit better.
Once you are close to the right alignment, start tightening bolts gradually, trying to maintain the alignment. You can go as slow and as careful as you like here to dial it in. You can get within 1/8" (3mm) of accuracy with this setup.