Working with Aluminum T-Slot Extrusion
There are a few techniques and concepts for aluminum extrusion that you need to understand while building a Chrysalis Enclosure. Please read this section carefully.
V-Slot and T-Slot
T-Slot aluminum extrusion is a long square beam with a slot on each of the four sides. T-Nuts can slide along inside the slots and be tightened to hold attachments to the tube anywhere along its length. This flexibility makes it easy to create any kind of furniture scale object using brackets that connect to multiple T-Slot beams at the same time.
V-Slot beams work the same as T-Slot extrusion, but have a slight angle all along the top of each slot. This angle allows V-Wheels to move along them like the track of a rail.
This kit is made of V-Slot extrusion, but any 20mm T-Slot extrusion should work just as well.
T-Nuts
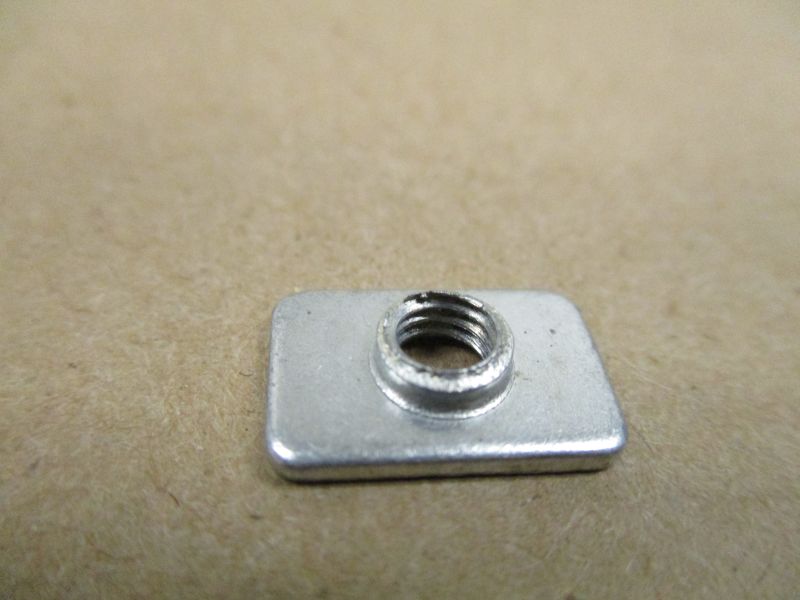
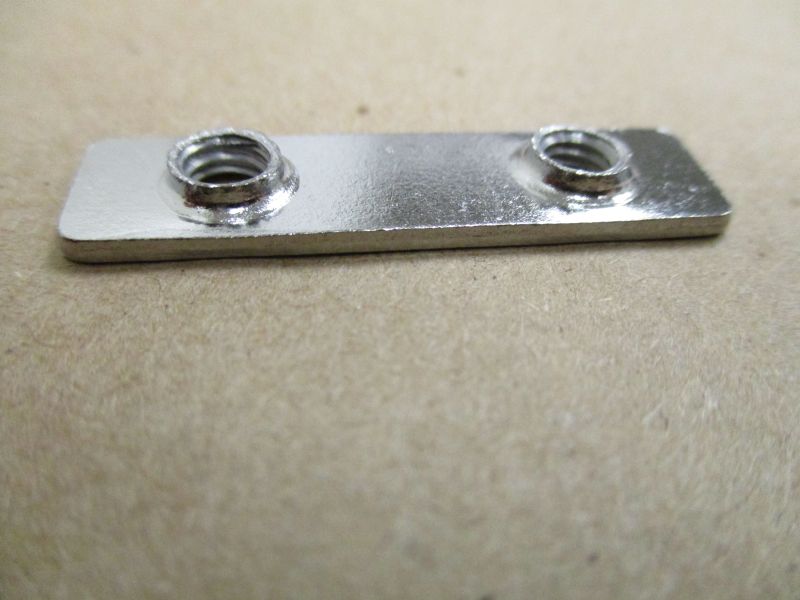
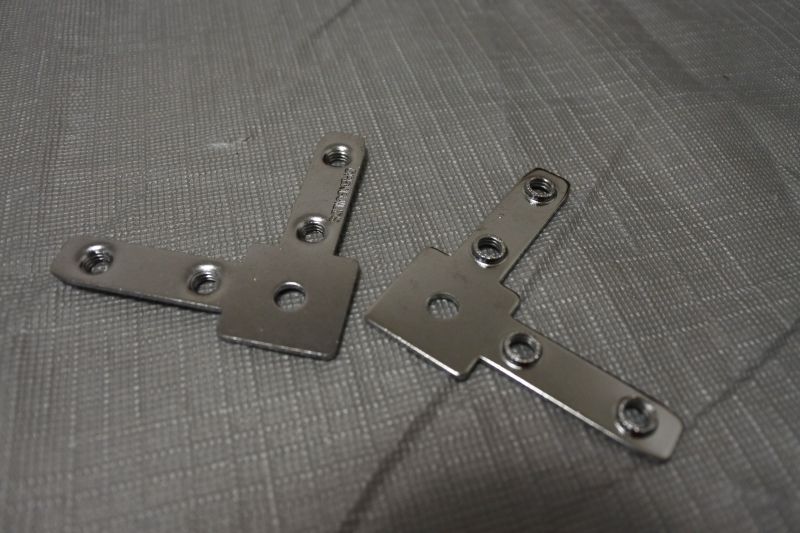
The special nuts that go in T-Slot extrusion are called T-Nuts. We use three different kinds in this kit. Single T-Nuts have a single threaded hole. Double T-Nuts have two threaded holes. The Makerlink used in this project has four holes and helps provide a sturdy right-angle connection between two beams.
Each T-Nut has a smooth side and a bumpy side where the threaded hole protrudes. The bumps on a T-Nut always point towards the center of the beam. The smooth side always points outward. When screwing an attachment into a T-Nut, the smooth side is pressed against the smooth wall of the T-Slot and a solid connection is made.
Preloading Plates
It can be tricky to line up screws with T-Nuts when the T-Nut is already in a T-Slot beam. Preloading means partially threading screws onto T-Nuts before sliding them onto the T-Slot beams. The trick is to firmly attach the screw to the T-Nut while allowing enough of a gap to remain to allow the whole assembly to be slid onto a T-Slot beam.
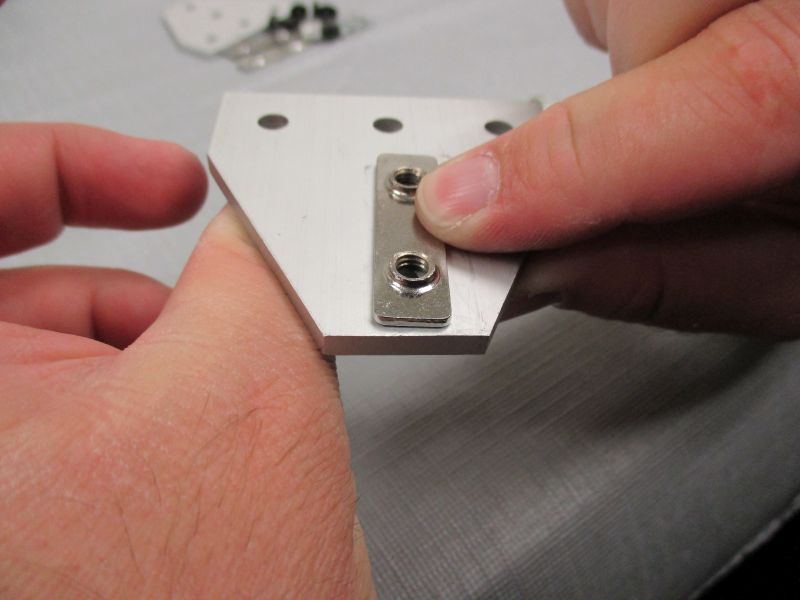
Press the T-Nut firmly against the back of the plate. Make sure it is aligned with the holes in the plate.
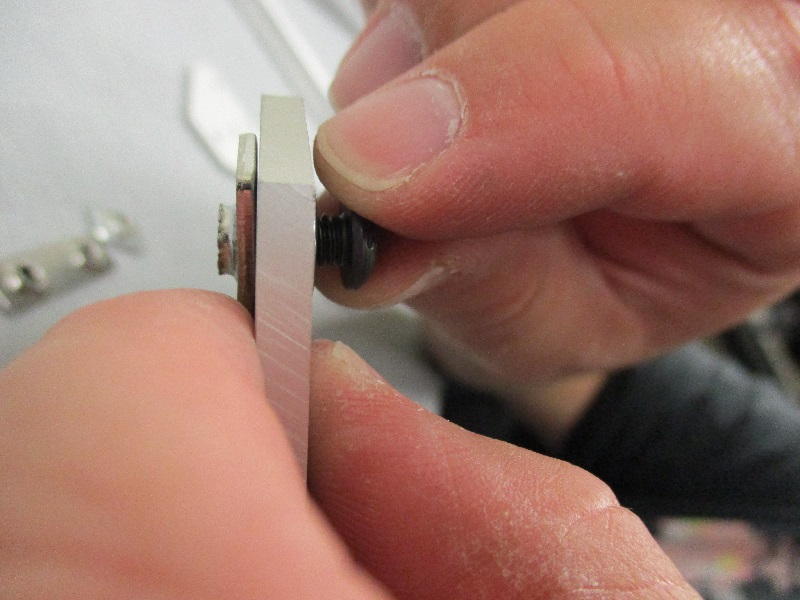

On the front of the plate, push a screw through and turn it with your fingers until it is partially threaded on the T-Nut pressed against the other side.
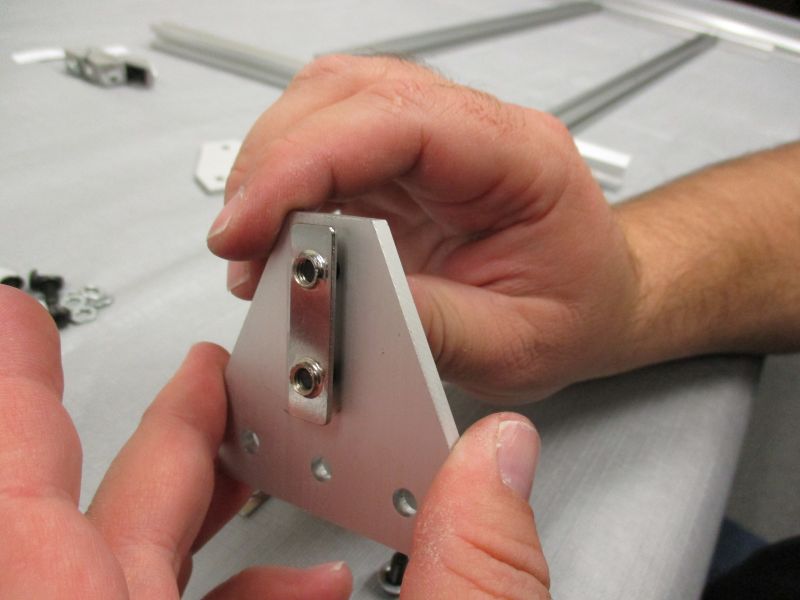
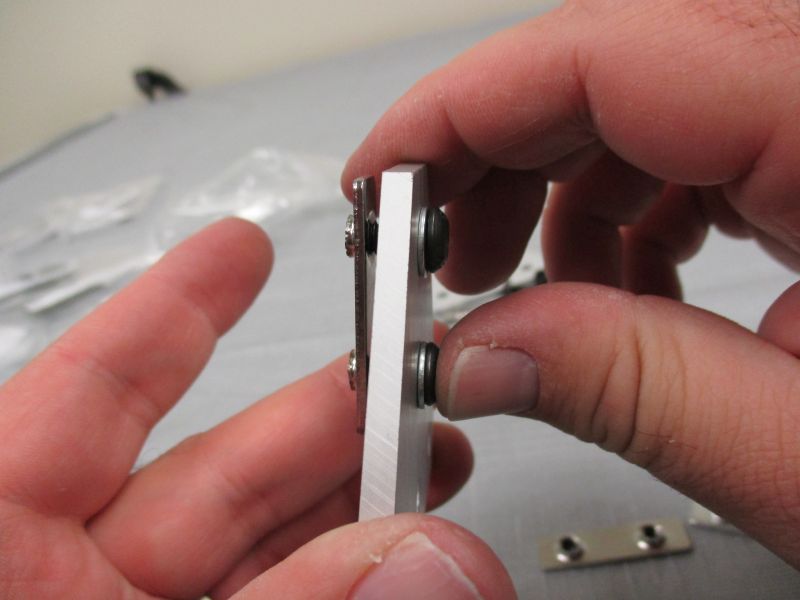
If it is a Double T-Nut, you will need to screw in a second screw as well.
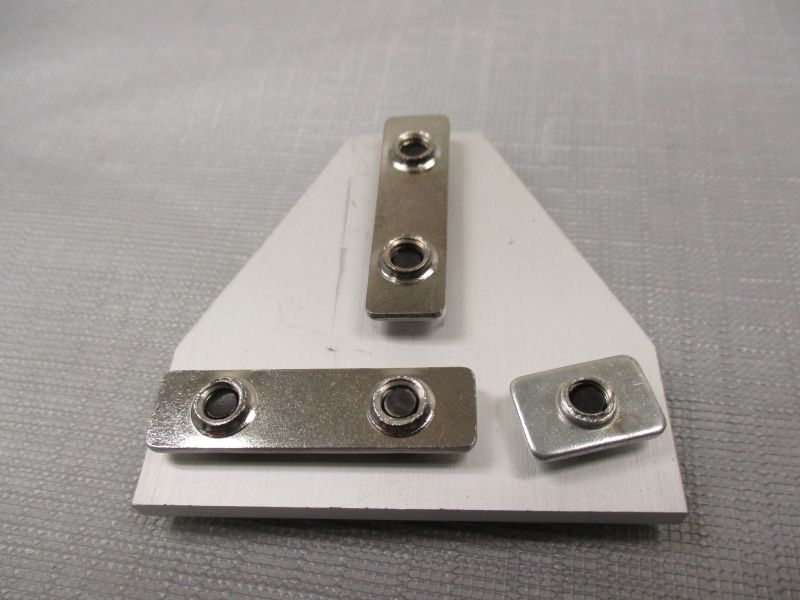
The instructions will show pictures for each plate indicating which holes need a Single T-Nut and which pairs of holes need Double T-Nuts. Pre-Loading Makerlink works in just the same way.